


Brightspeed Business
Hub Support
Brightspeed Business
Hub Support
Brightspeed Business
Hub Support
 Sign in to Business Hub

How to Create an Account Tag
Learn how to create and apply Account Tags to organize accounts for filtering, grouping, follow-up, statement ordering and other account management tasks.
How to Create an Account Tag
Learn how to create and apply Account Tags to organize accounts for filtering, grouping, follow-up, statement ordering and other account management tasks.
How to Create an Account Tag
Learn how to create and apply Account Tags to organize accounts for filtering, grouping, follow-up, statement ordering and other account management tasks.
1. From the top menu, click Statements.
2. Select Tags, then click Manage Tags.
1. From the top menu, click Statements.
2. Select Tags, then click Manage Tags.
1. From the top menu, click Statements.
2. Select Tags, then click Manage Tags.
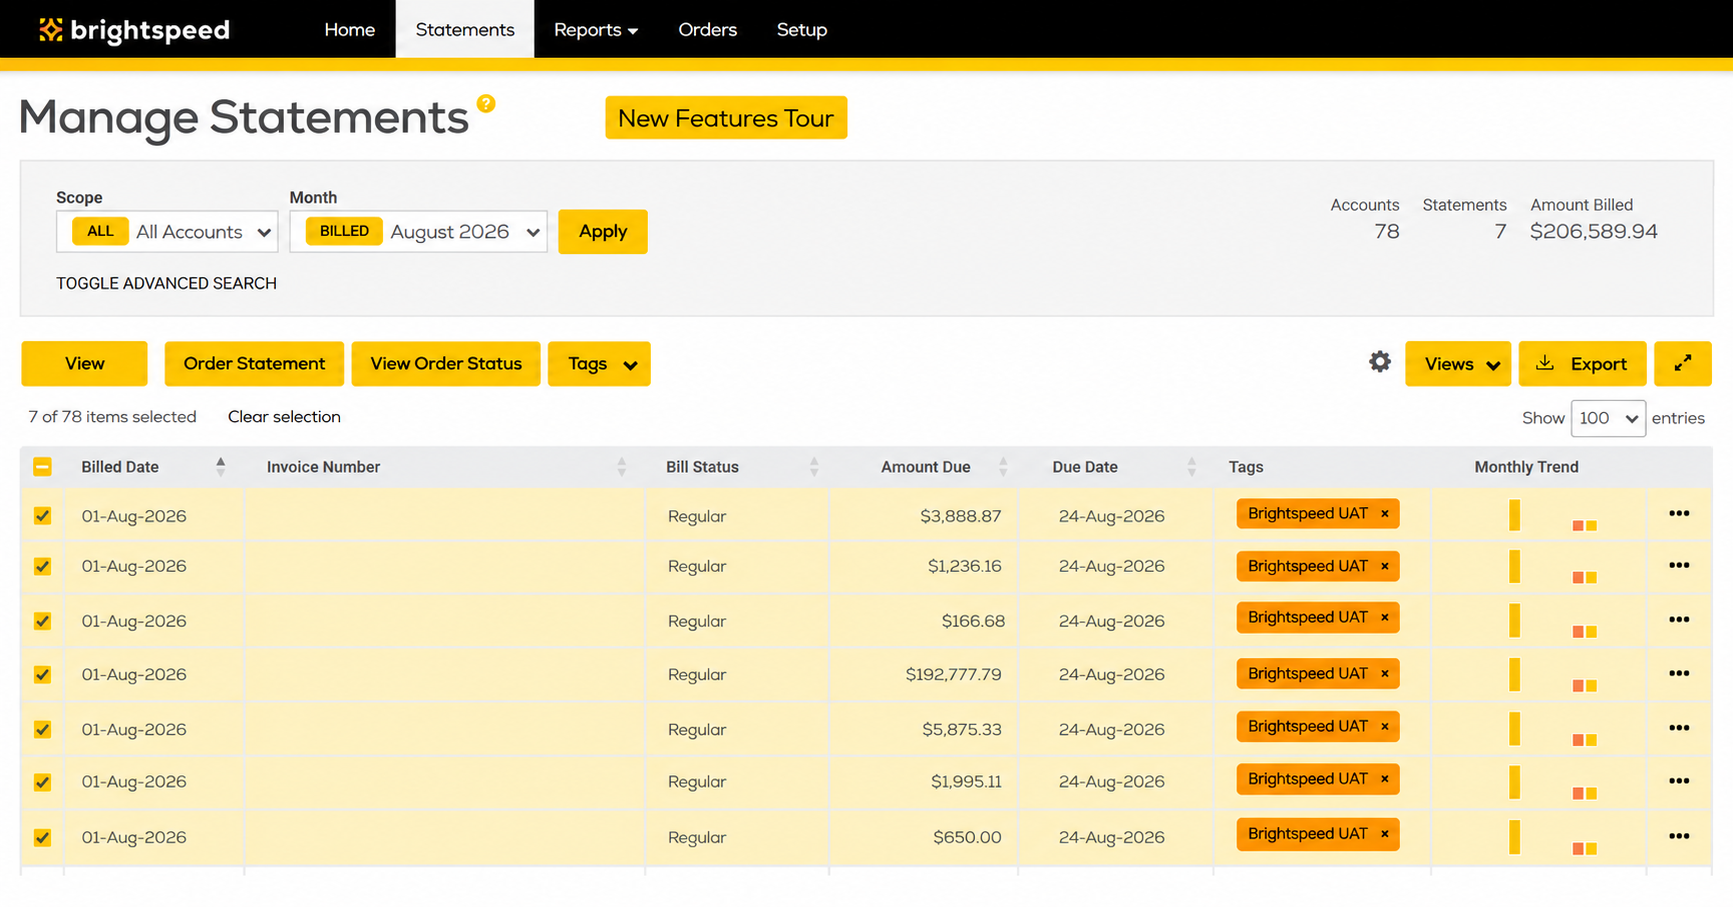
3. Choose Create New Tag.
4. Enter a name for your account tag and select a color. Click Save.
The new account tag is now available to apply to your accounts. You can apply one or multiple tags to your accounts.
3. Choose Create New Tag.
4. Enter a name for your account tag and select a color. Click Save.
The new account tag is now available to apply to your accounts. You can apply one or multiple tags to your accounts.
3. Choose Create New Tag.
4. Enter a name for your account tag and select a color. Click Save.
The new account tag is now available to apply to your accounts. You can apply one or multiple tags to your accounts.
How to Apply an Account Tag
1. From the top menu, click Statements.
2. Select one or more accounts, and then click Tags.
3. Choose Apply Tags.
4. Choose the tag to apply to the selected accounts. Click Apply.
The account tag will now appear in the Tags column for the associated accounts on the Statements list.
How to Edit or Delete an Account Tag
1. From the top menu, click Statements.
2. Select Tags, then click Manage Tags.
3. Choose the edit icon to rename or change the color of the tag.
4. Choose the X icon to delete the tag.
How to Remove an Account Tag from an Account
1. From the top menu, click Statements.
2. On the Statements list, find the account with the tag you want to remove.
3. Select the X next to the account tag.
The account tag will no longer appear in the Tags column for that account.
How to Filter the Statements List View by Account Tag
1. From the top menu, click Statements.
2. On the Statements list, select a tag to filter accounts with that assigned tag.
3. The Statement list view will update to show only the accounts assigned with the selected account tag.
4. To reset the view to all accounts, select All Accounts under Scope control.
How to Apply an Account Tag
1. From the top menu, click Statements.
2. Select one or more accounts, and then click Tags.
3. Choose Apply Tags.
4. Choose the tag to apply to the selected accounts. Click Apply.
The account tag will now appear in the Tags column for the associated accounts on the Statements list.
How to Edit or Delete an Account Tag
1. From the top menu, click Statements.
2. Select Tags, then click Manage Tags.
3. Choose the edit icon to rename or change the color of the tag.
4. Choose the X icon to delete the tag.
How to Remove an Account Tag from an Account
1. From the top menu, click Statements.
2. On the Statements list, find the account with the tag you want to remove.
3. Select the X next to the account tag.
The account tag will no longer appear in the Tags column for that account.
How to Filter the Statements List View by Account Tag
1. From the top menu, click Statements.
2. On the Statements list, select a tag to filter accounts with that assigned tag.
3. The Statement list view will update to show only the accounts assigned with the selected account tag.
4. To reset the view to all accounts, select All Accounts under Scope control.
How to Apply an Account Tag
1. From the top menu, click Statements.
2. Select one or more accounts, and then click Tags.
3. Choose Apply Tags.
4. Choose the tag to apply to the selected accounts. Click Apply.
The account tag will now appear in the Tags column for the associated accounts on the Statements list.
How to Edit or Delete an Account Tag
1. From the top menu, click Statements.
2. Select Tags, then click Manage Tags.
3. Choose the edit icon to rename or change the color of the tag.
4. Choose the X icon to delete the tag.
How to Remove an Account Tag from an Account
1. From the top menu, click Statements.
2. On the Statements list, find the account with the tag you want to remove.
3. Select the X next to the account tag.
The account tag will no longer appear in the Tags column for that account.
How to Filter the Statements List View by Account Tag
1. From the top menu, click Statements.
2. On the Statements list, select a tag to filter accounts with that assigned tag.
3. The Statement list view will update to show only the accounts assigned with the selected account tag.
4. To reset the view to all accounts, select All Accounts under Scope control.