


Brightspeed Business
Hub Support
Brightspeed Business
Hub Support
Brightspeed Business
Hub Support
 Sign in to Business Hub

How to Create a Custom View
Learn how to customize statement views to display the billing information you need, including billing details, to save custom views for future use.
How to Create a Custom View
Learn how to customize statement views to display the billing information you need, including billing details, to save custom views for future use.
How to Create a Custom View
Learn how to customize statement views to display the billing information you need, including billing details, to save custom views for future use.
1. From the top menu, click Statements.
1. From the top menu, click Statements.
1. From the top menu, click Statements.
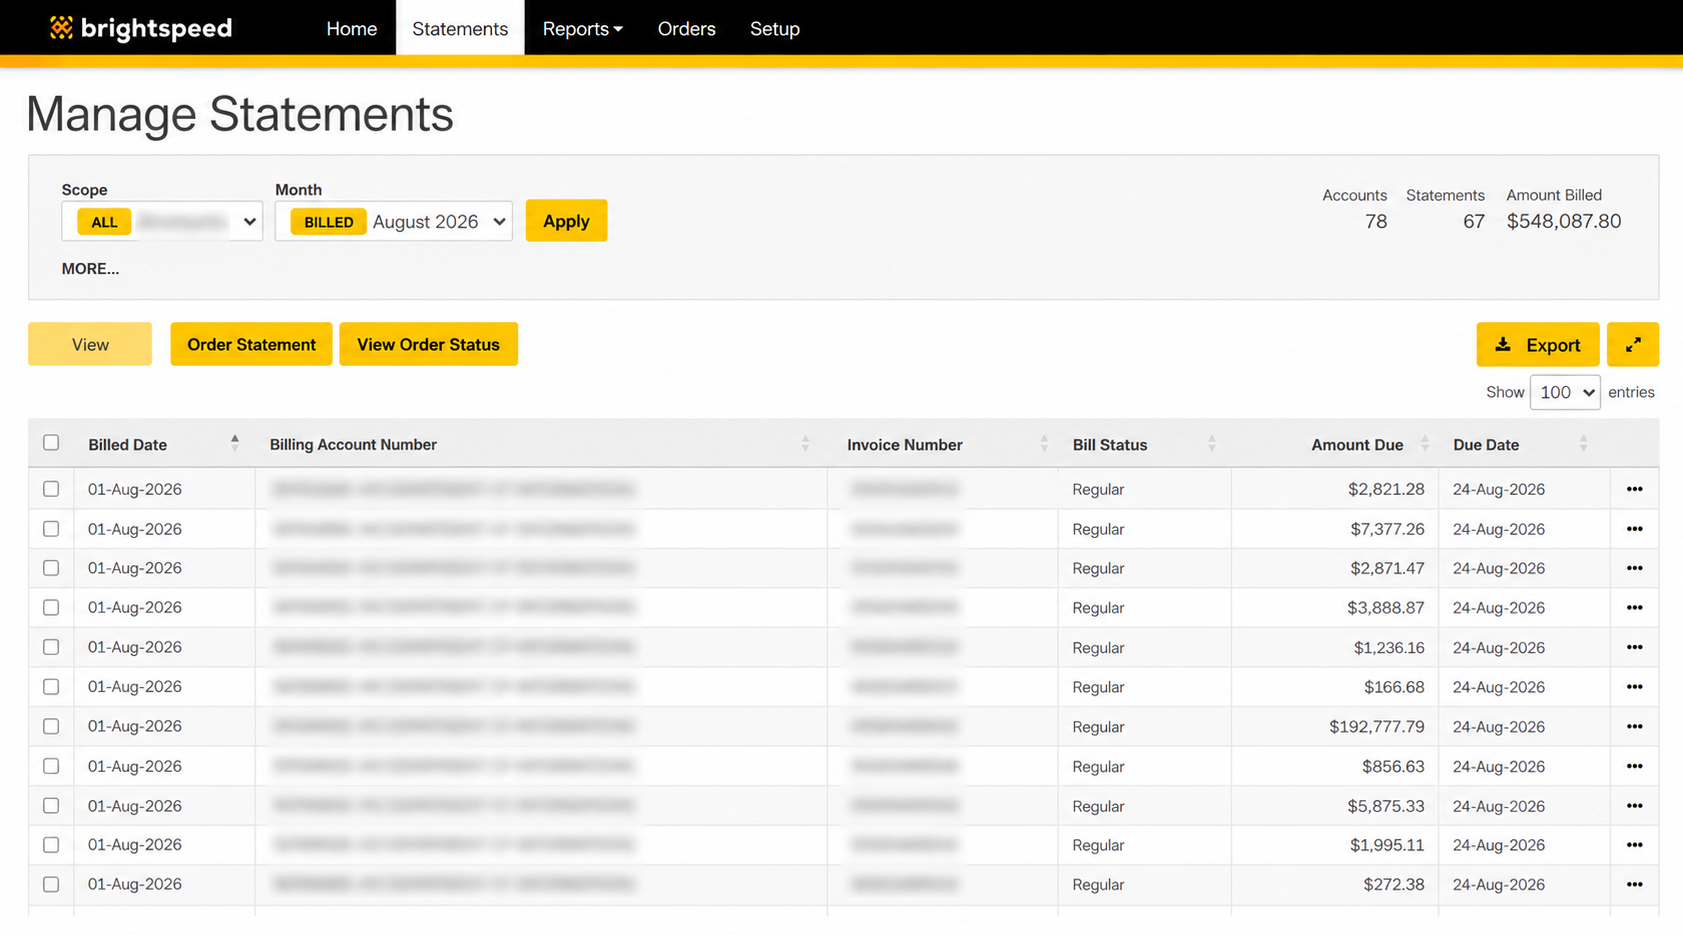
2. Click the column selector icon, next to Views.
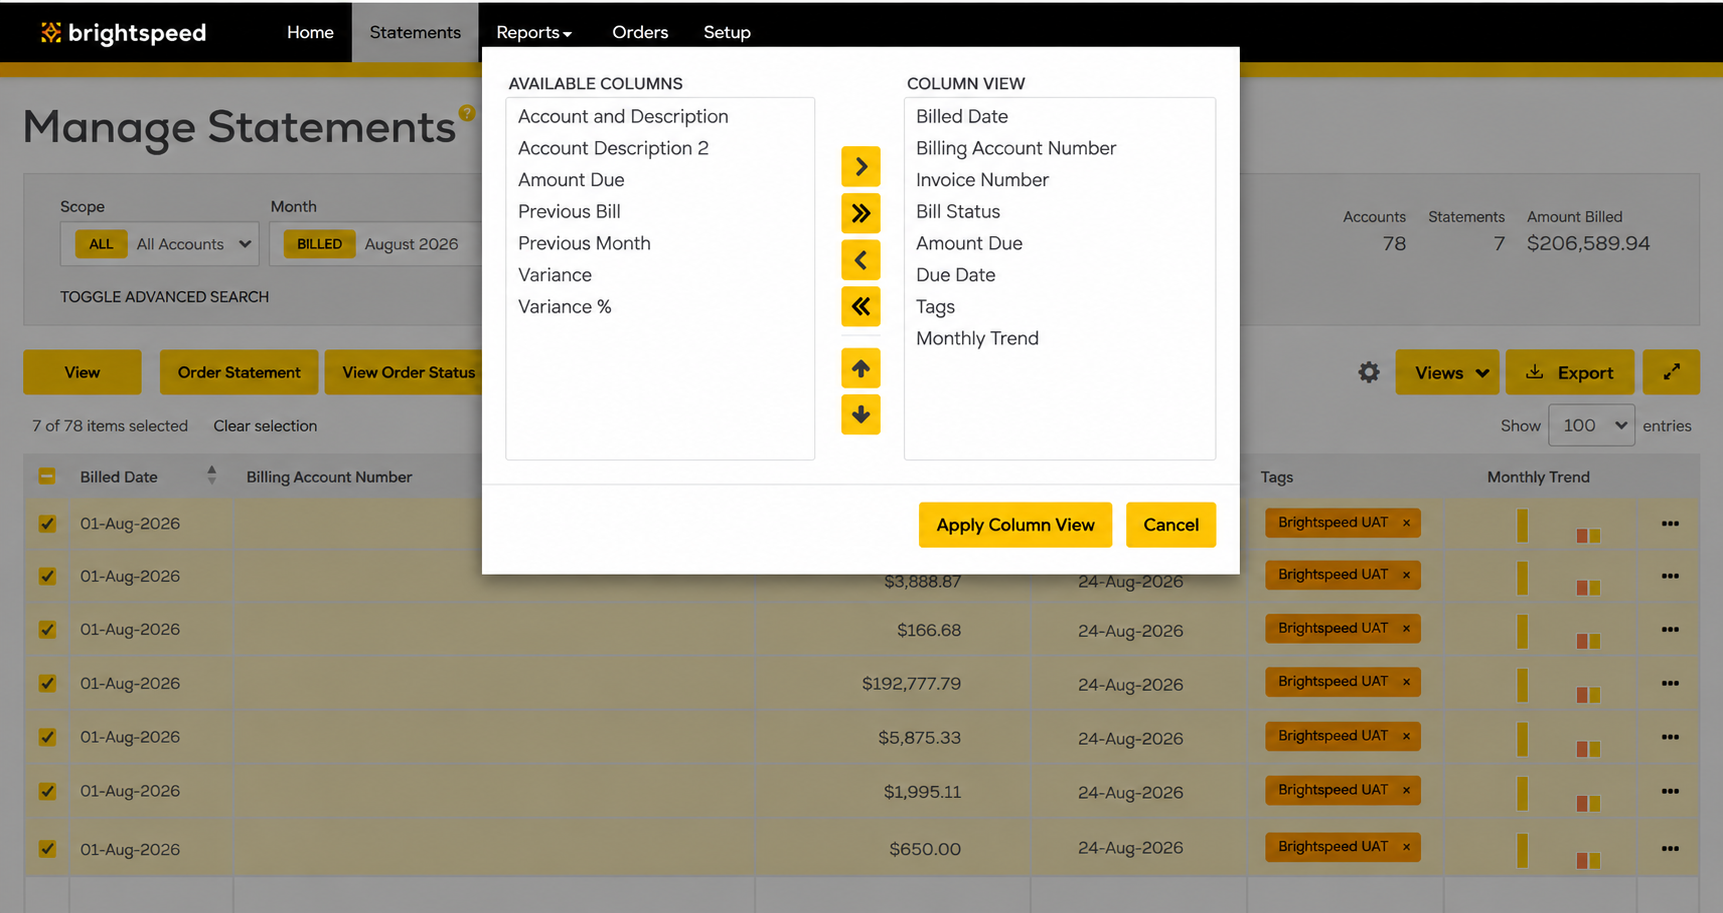
3. From Available Columns select one or more data types to add to your statement list view. Use the Shift key to select multiple data types.
4. Use the > and < buttons to include or exclude data types from the new view. Use the >> and << buttons to select and include or exclude all data types available. Reorder the columns using the up and down arrow buttons.
5. Click Apply Column View.
6. Your new view will display in Statements with the selected columns added to the view.
7. To rearrange the column order, select the column header and drag and drop to the preferred order.
8. To save the new, custom view, select Views.
9. Click Save Current View.
10. Enter a name for the custom view.
11. Click Close.
2. Click the column selector icon, next to Views.
3. From Available Columns select one or more data types to add to your statement list view. Use the Shift key to select multiple data types.
4. Use the > and < buttons to include or exclude data types from the new view. Use the >> and << buttons to select and include or exclude all data types available. Reorder the columns using the up and down arrow buttons.
5. Click Apply Column View.
6. Your new view will display in Statements with the selected columns added to the view.
7. To rearrange the column order, select the column header and drag and drop to the preferred order.
8. To save the new, custom view, select Views.
9. Click Save Current View.
10. Enter a name for the custom view.
11. Click Close.
2. Click the column selector icon, next to Views.
3. From Available Columns select one or more data types to add to your statement list view. Use the Shift key to select multiple data types.
4. Use the > and < buttons to include or exclude data types from the new view. Use the >> and << buttons to select and include or exclude all data types available. Reorder the columns using the up and down arrow buttons.
5. Click Apply Column View.
6. Your new view will display in Statements with the selected columns added to the view.
7. To rearrange the column order, select the column header and drag and drop to the preferred order.
8. To save the new, custom view, select Views.
9. Click Save Current View.
10. Enter a name for the custom view.
11. Click Close.
The new, customized view will be saved for future use and can be selected from Views. You can create new views based on existing views by selecting the existing view, making changes, and then saving the new view.
The new, customized view will be saved for future use and can be selected from Views. You can create new views based on existing views by selecting the existing view, making changes, and then saving the new view.
The new, customized view will be saved for future use and can be selected from Views. You can create new views based on existing views by selecting the existing view, making changes, and then saving the new view.
How to Apply a View
1. From the top menu, click Statements.
2. Select Views.
3. Choose between the displayed Default Views and Saved Views. Select the view to display.
4. The Statements list view will update and display, based on the selected view.
How to Delete or Rename a Saved View
1. From the top menu, click Statements.
2. Select Views.
3. Choose the edit icon to rename the view.
4. Choose the X icon to delete the view.
How to Apply a View
1. From the top menu, click Statements.
2. Select Views.
3. Choose between the displayed Default Views and Saved Views. Select the view to display.
4. The Statements list view will update and display, based on the selected view.
How to Delete or Rename a Saved View
1. From the top menu, click Statements.
2. Select Views.
3. Choose the edit icon to rename the view.
4. Choose the X icon to delete the view.
How to Apply a View
1. From the top menu, click Statements.
2. Select Views.
3. Choose between the displayed Default Views and Saved Views. Select the view to display.
4. The Statements list view will update and display, based on the selected view.
How to Delete or Rename a Saved View
1. From the top menu, click Statements.
2. Select Views.
3. Choose the edit icon to rename the view.
4. Choose the X icon to delete the view.