How to use your Calix u6t Series Router
How to use your Calix u6t Series Router
How to use your Calix u6t Series Router
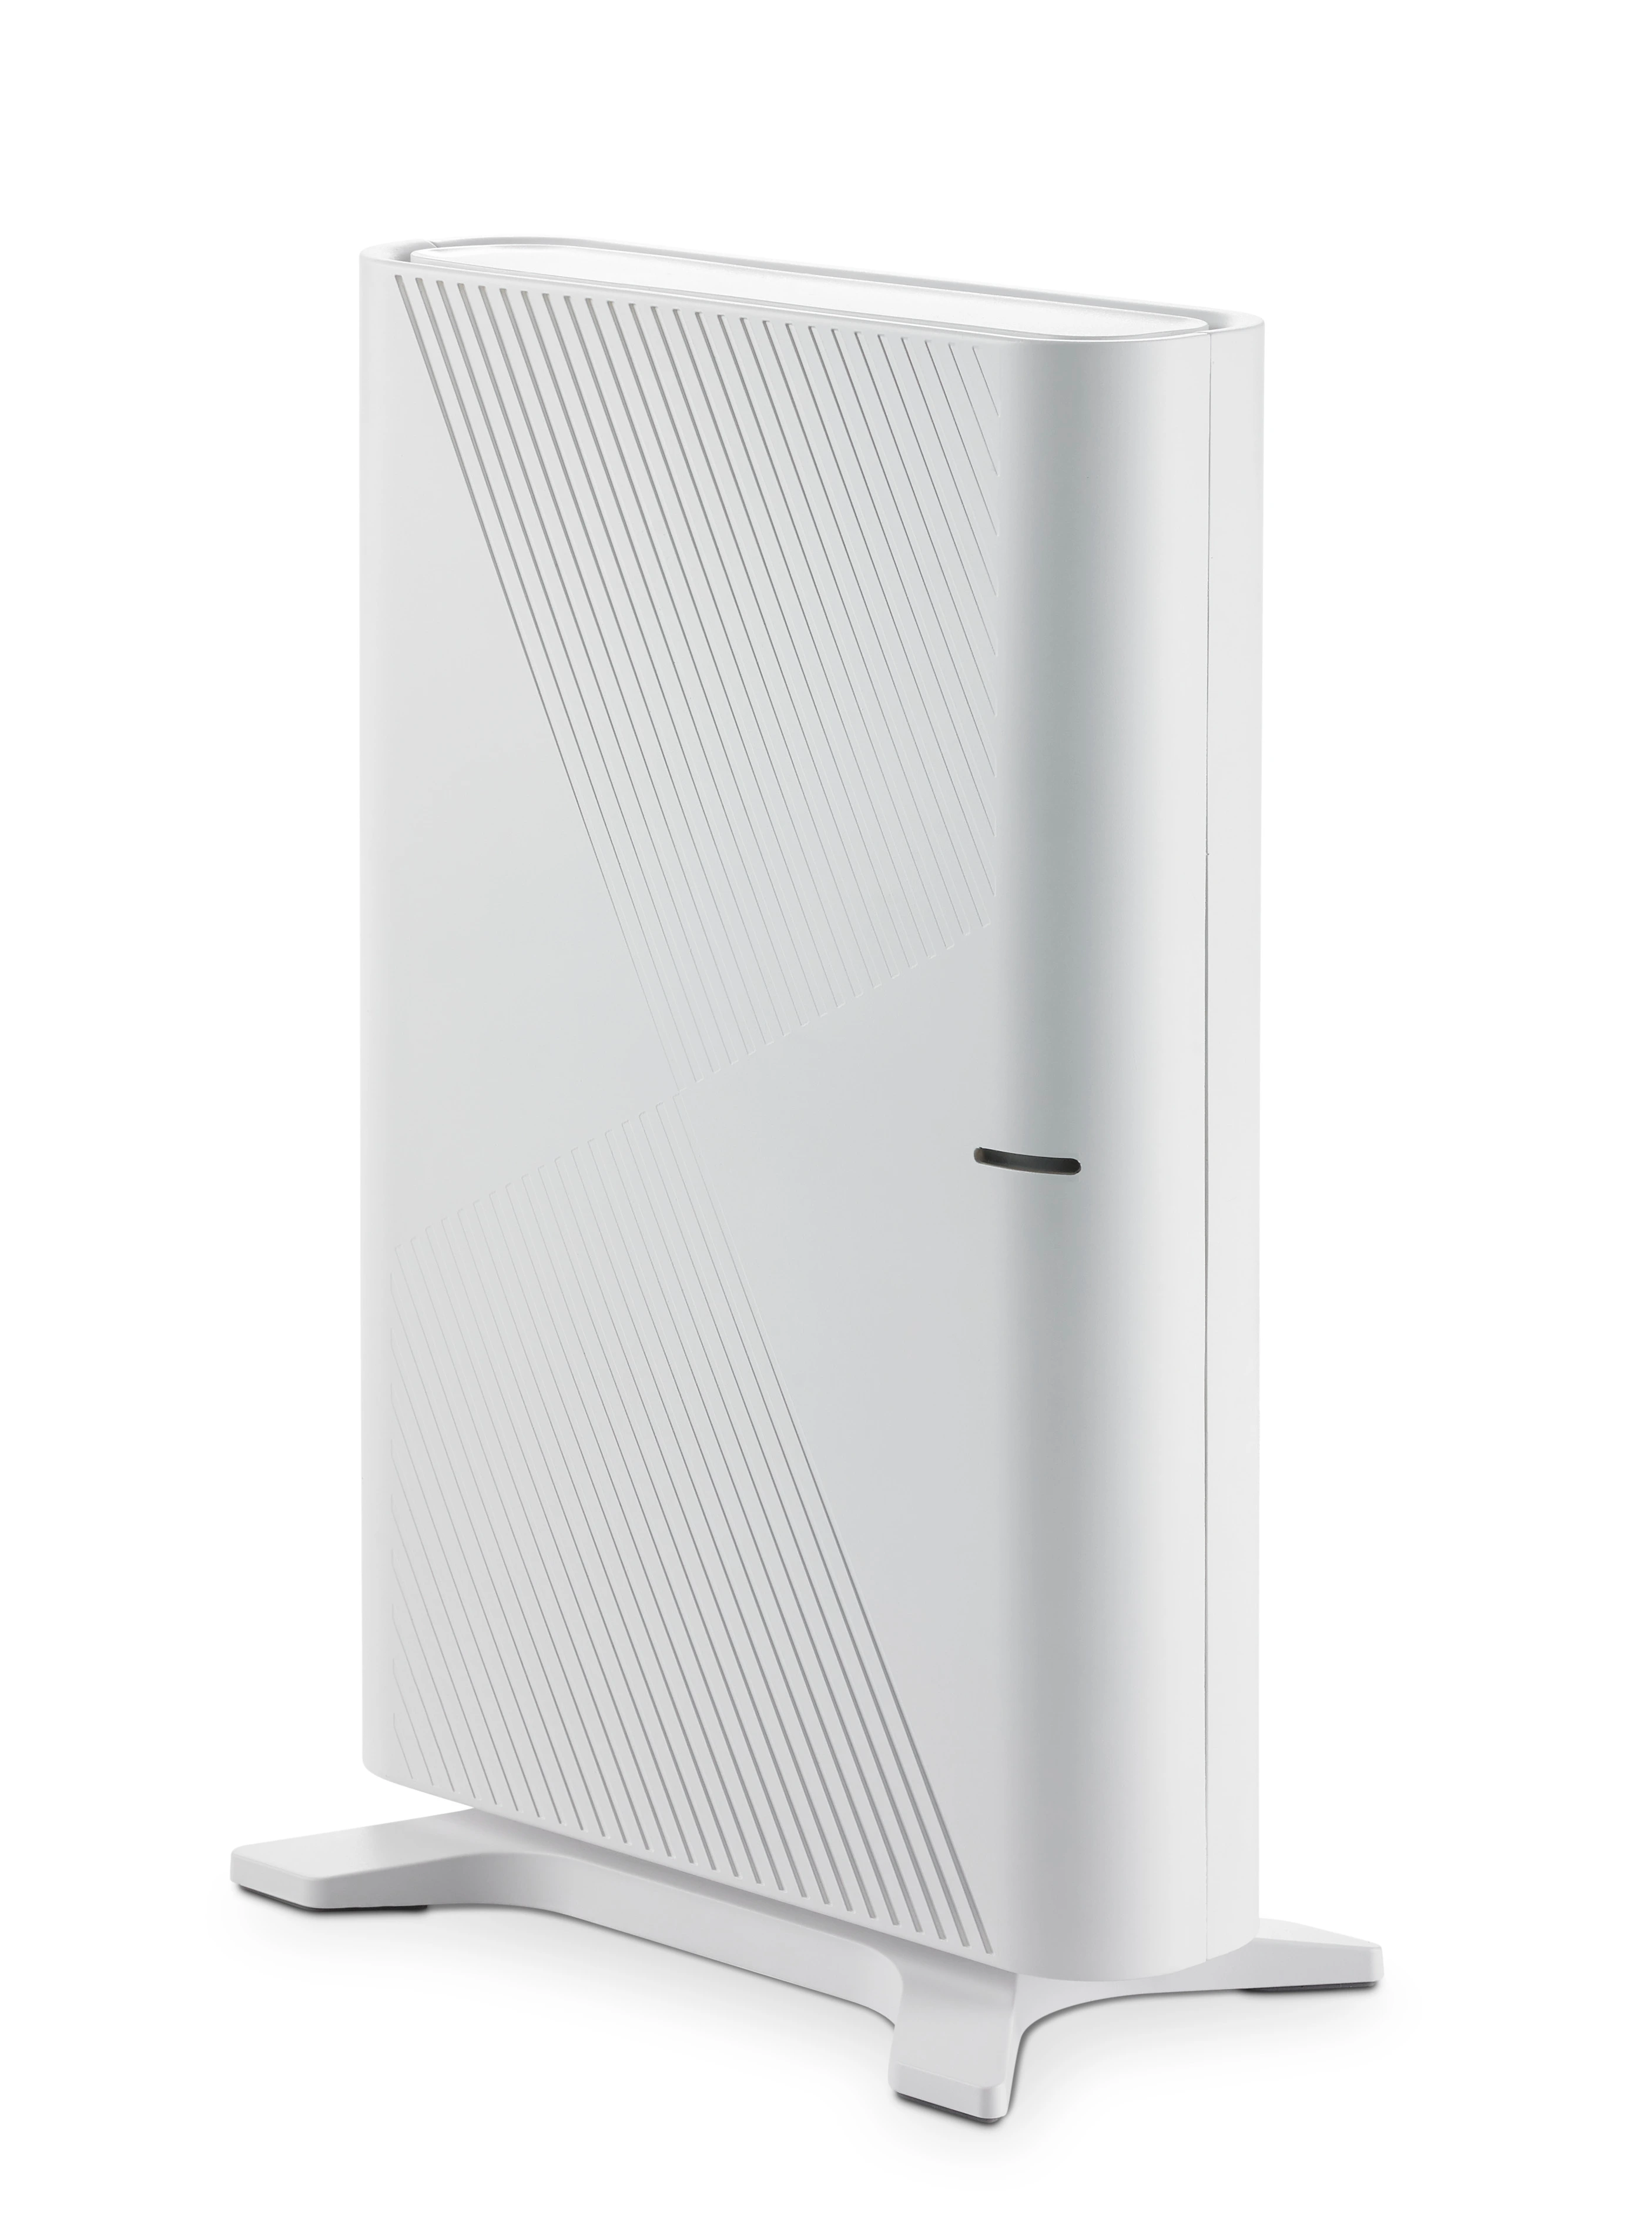
Calix u6t features
WiFi 6 technology with dual-band 2.4 GHz (2 antennas) and 5 GHz 802.11ax (4 antennas)
Gigabit Ethernet WAN/LAN ports
Dual POTS ports for Voice-over-IP (VoIP) connectivity to standard business telephones
Support Calix u4 mesh WiFi nodes for simple range extensions
Calix Cloud-based Dynamic QoS to prioritize data through the router to devices
Self-repairing features to identify and fix problems automatically
Standards-based WiFi WPA3 security
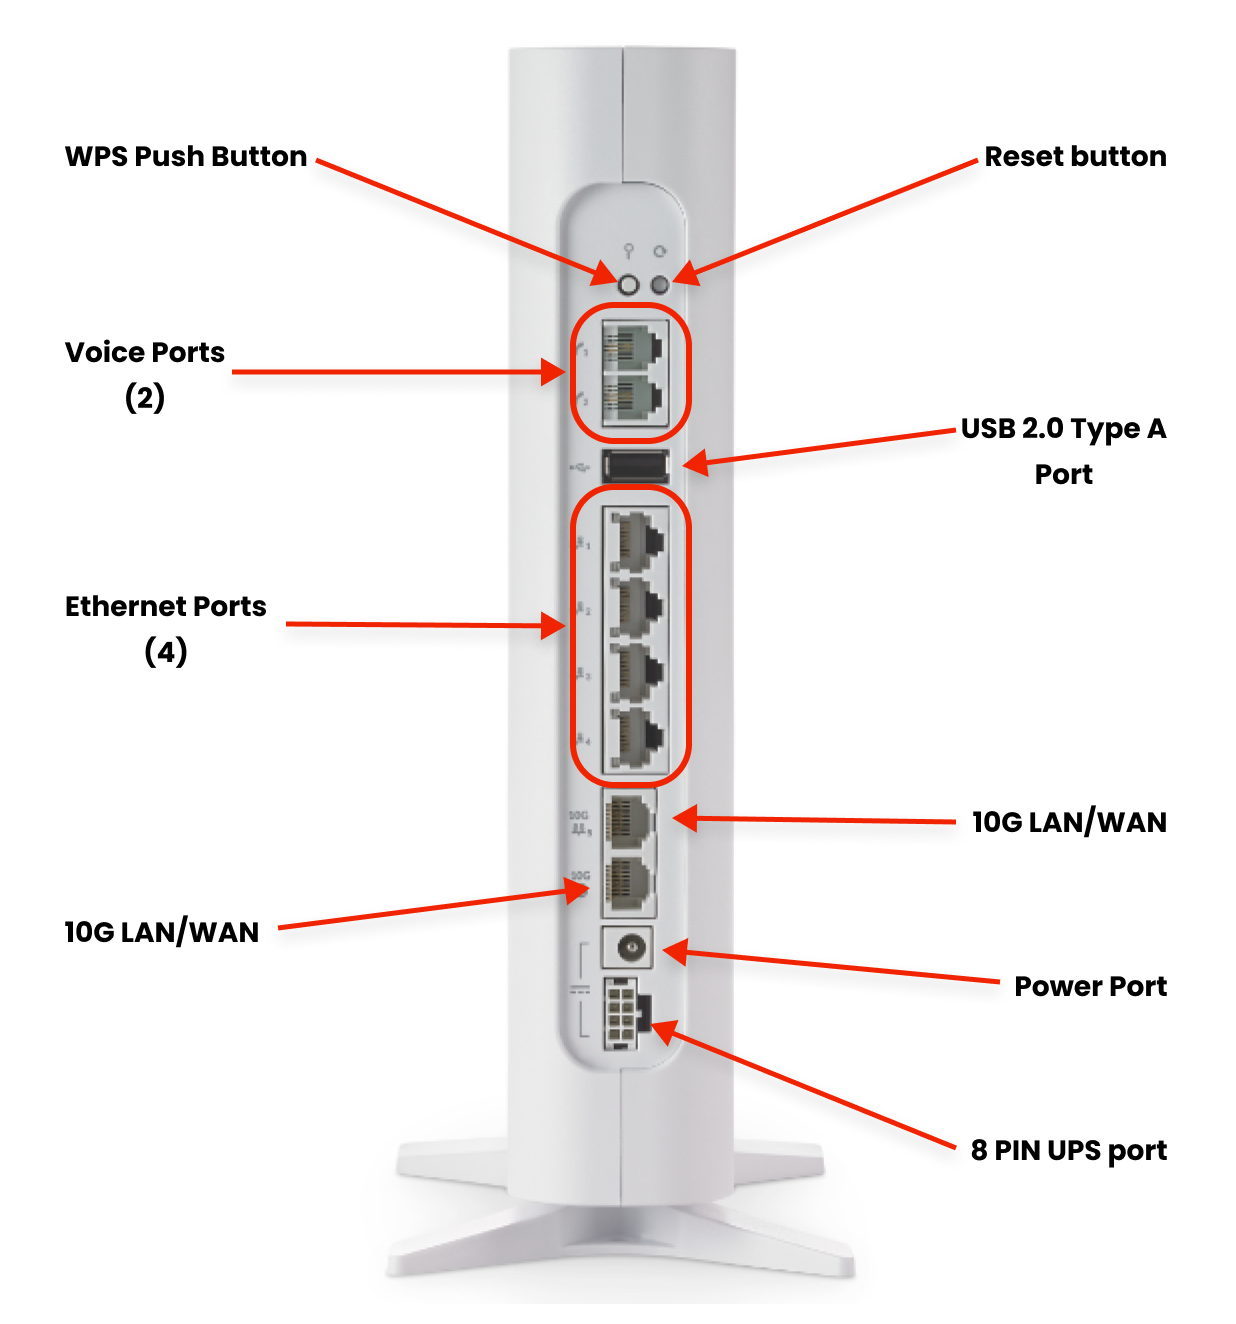
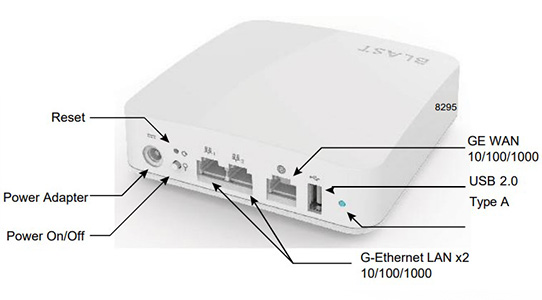
Calix u6t Series Router Diagram
Calix u6t Series Router Diagram
Calix u6t Series Router Diagram
The u4m mesh node
The u4m mesh node
The u4m mesh node
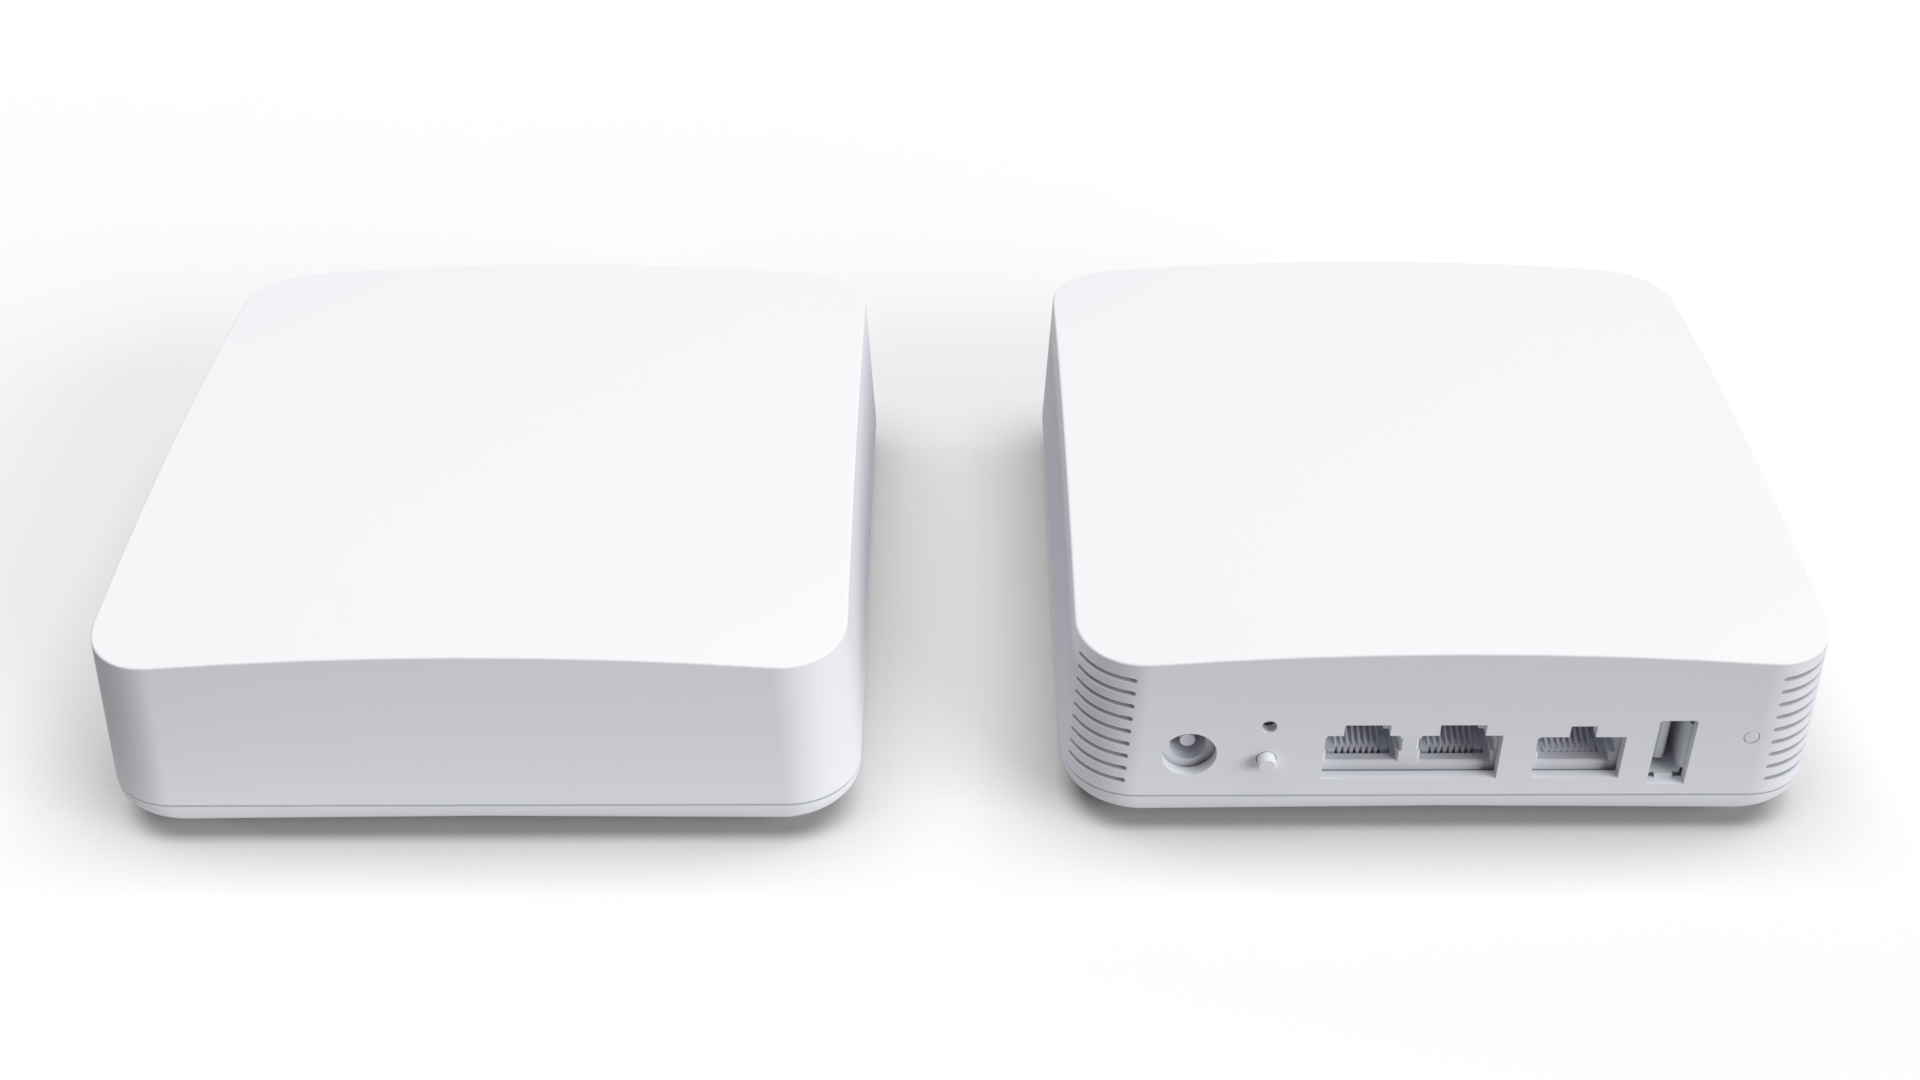
u4m mesh node Features
- WiFi 6 technology with dual-band 2.4 GHz (2 antennas) and 5 GHz 802.11ax (4 antennas)
- Gigabit Ethernet WAN/LAN ports
- Dual POTS ports for Voice-over-IP (VoIP) connectivity to standard business telephones
- Support Calix u4 mesh WiFi nodes for simple range extensions
- Calix Cloud-based Dynamic QoS: Prioritizes data through the router to devices
- Self-healing features to identify problems and fix automatically
Understanding your modem lights
Understanding your modem lights
Understanding your modem lights
- Start up your modem by connecting it to the power source or restart your modem by disconnecting and reconnecting it.
- Start up your modem by connecting it to the power source or restart your modem by disconnecting and reconnecting it.
- Start up your modem by connecting it to the power source or restart your modem by disconnecting and reconnecting it.
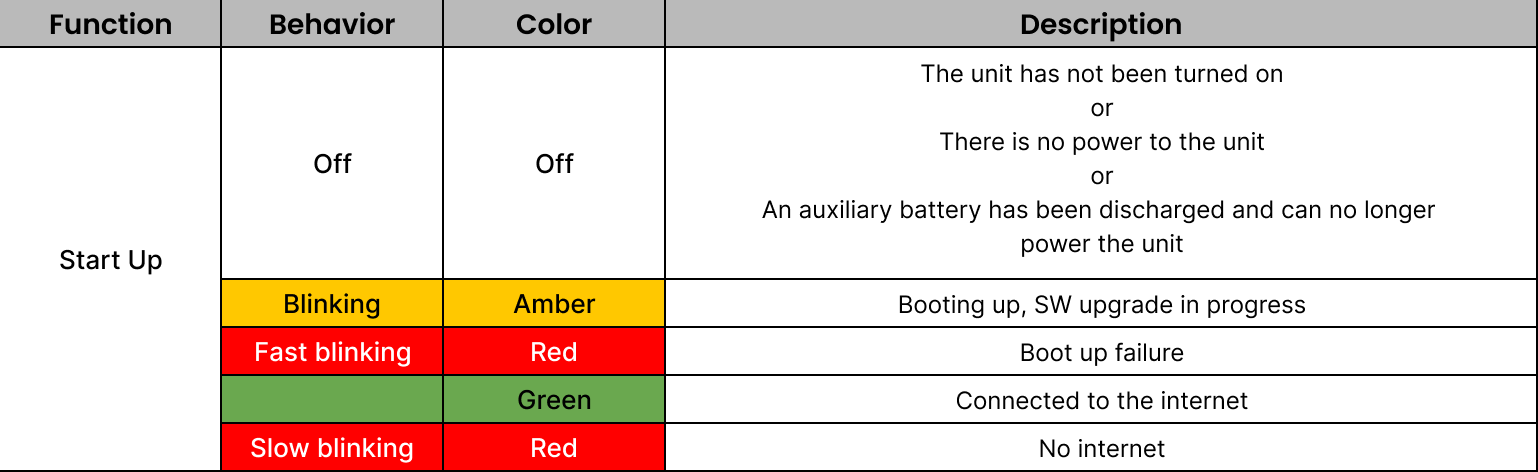
If you’ve enabled WPS on your modem and don’t need a password to connect to Brightspeed WiFi, use the chart to see if you’ve successfully connected your device.
To enable WPS, press the WPS button on your modem. Then, look for the LED light it displays.
If you’ve enabled WPS on your modem and don’t need a password to connect to Brightspeed WiFi, use the chart to see if you’ve successfully connected your device.
To enable WPS, press the WPS button on your modem. Then, look for the LED light it displays.
If you’ve enabled WPS on your modem and don’t need a password to connect to Brightspeed WiFi, use the chart to see if you’ve successfully connected your device.
To enable WPS, press the WPS button on your modem. Then, look for the LED light it displays.

Modem trouble shooting tips
Did you know? If your internet connection is spotty or slow, the best place to start is rebooting your modem.
Still not running right? Check to see if you need to update the modem's firmware.
Modem trouble shooting tips
Did you know? If your internet connection is spotty or slow, the best place to start is rebooting your modem.
Still not running right? Check to see if you need to update the modem's firmware.
Modem trouble shooting tips
Did you know? If your internet connection is spotty or slow, the best place to start is rebooting your modem.
Still not running right? Check to see if you need to update the modem's firmware.
Troubleshooting tips
If the firmware link doesn't work, try another browser.
Note: Chrome is known to have issues with this type of link.
Right-click the link.
Select "Copy Link Address."
Paste the link into a new browser window or tab.
Troubleshooting tips
If the firmware link doesn't work, try another browser.
Note: Chrome is known to have issues with this type of link.
Right-click the link.
Select "Copy Link Address."
Paste the link into a new browser window or tab.
Troubleshooting tips
If the firmware link doesn't work, try another browser.
Note: Chrome is known to have issues with this type of link.
Right-click the link.
Select "Copy Link Address."
Paste the link into a new browser window or tab.