-
Small Business
Shop
My CenturyLink
Support
- Enterprise & Wholesale
Business help
Creating a new Control Center user
As a Control Center system administrator, you can create new users at your organization. When you create a new user, you must also give permission for role-based functions (e.g., user administration, billing, reporting) and assign at least one account to the user. Without roles or accounts, the user will be able to sign in, but will not be able to do anything in Control Center.
As a system administrator, you can also add an existing user, change a user's permissions, and assign accounts to a user. (If you're not a system administrator, you can view a list of who can make these changes in your organization.)
After you create a profile for a user, they can update their profile (contact information) as needed.
To create a new Control Center user:
- Sign in to Control Center. (Get help retrieving your username or password.)
- Click Admin, then click Users.
Control Center lists the users for your organization. Users with additional permissions or roles have icons next to their username: system administrators ().
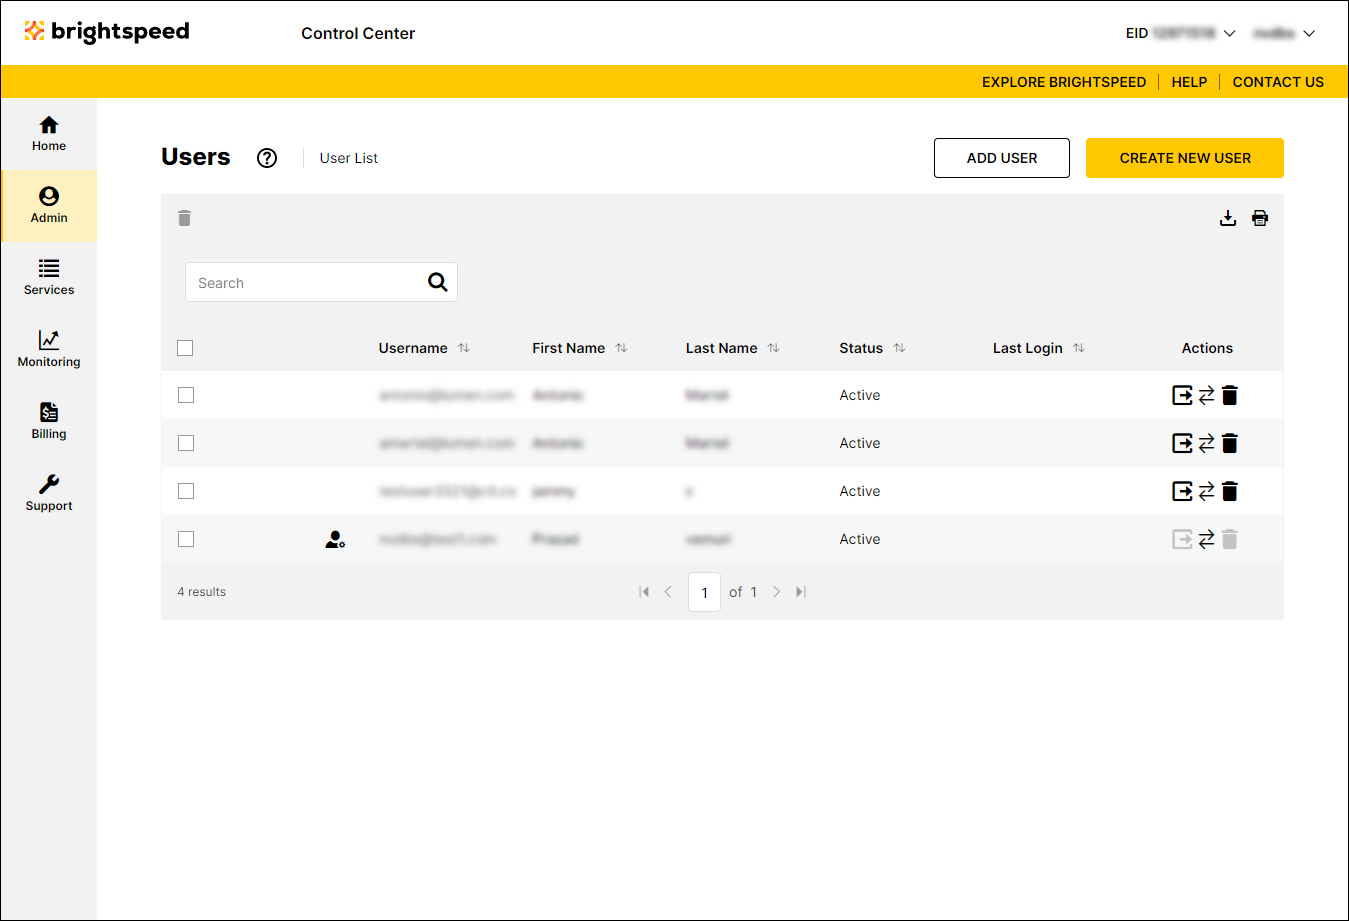
- Click Create New User.
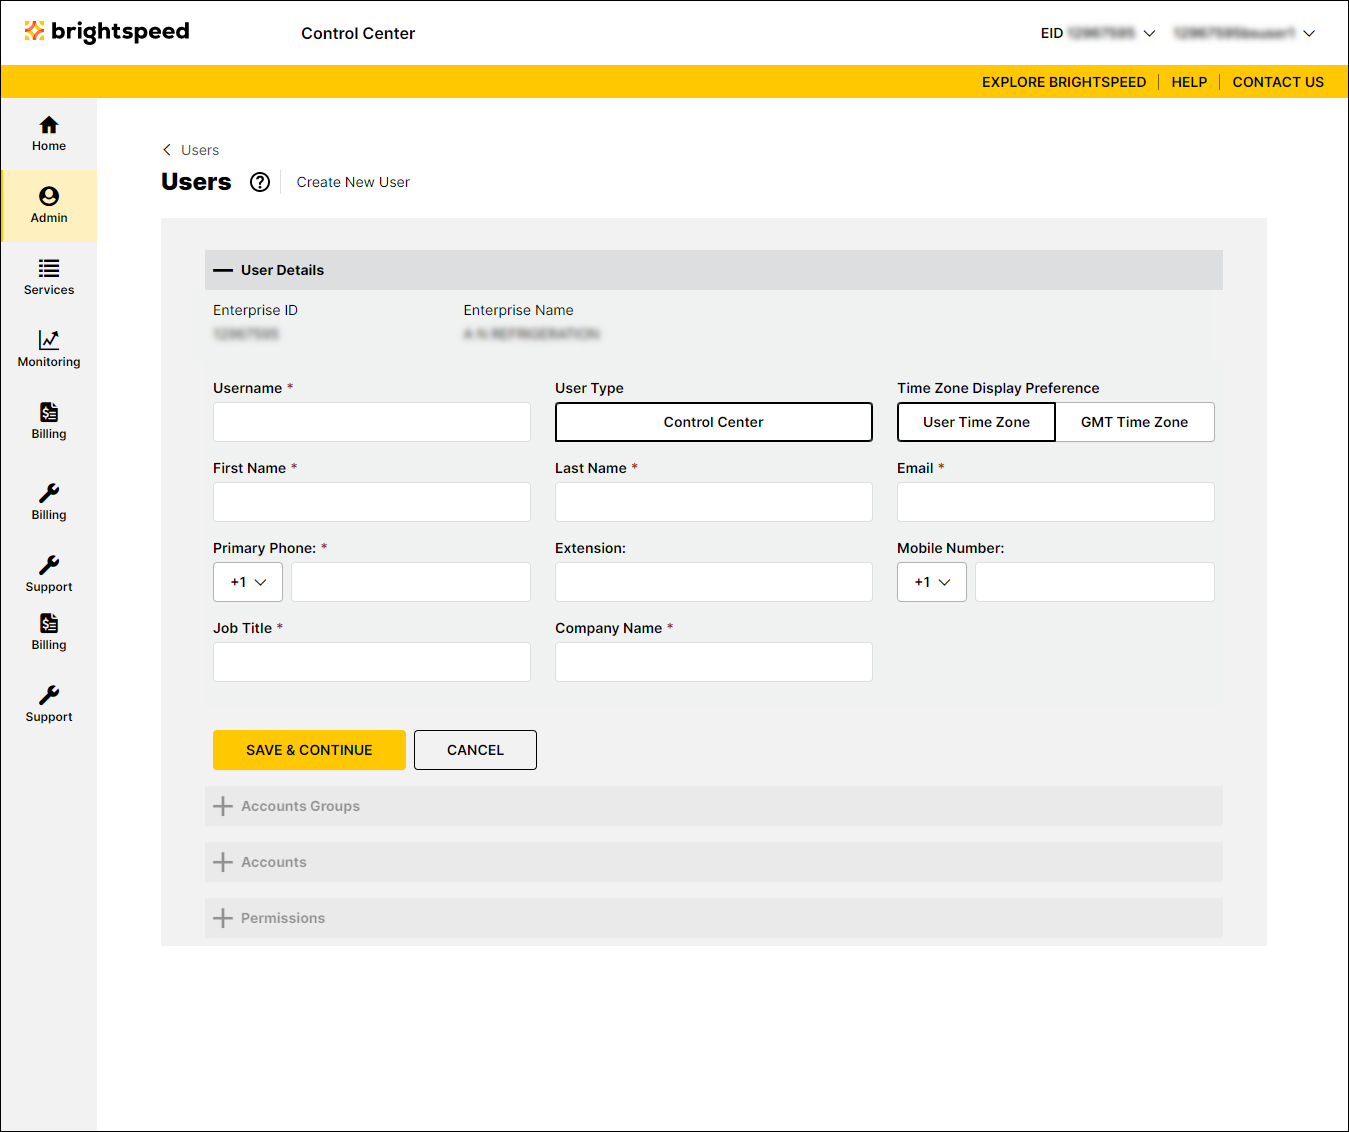
- Fill in the profile information for the new user.
Control Center checks the information as you enter it. You may need a couple tries to find a username that isn't already used by someone else. (Learn more about choosing a Control Center username)
- When you've filled in the profile, click Save & Continue.
Control Center opens the Account Groups section and sends two emails to the email you provided for this user: one email contains the username and instructions for signing in, one contains a temporary password. For reference, the emails also include a list of the Control Center system administrators for your oranization.
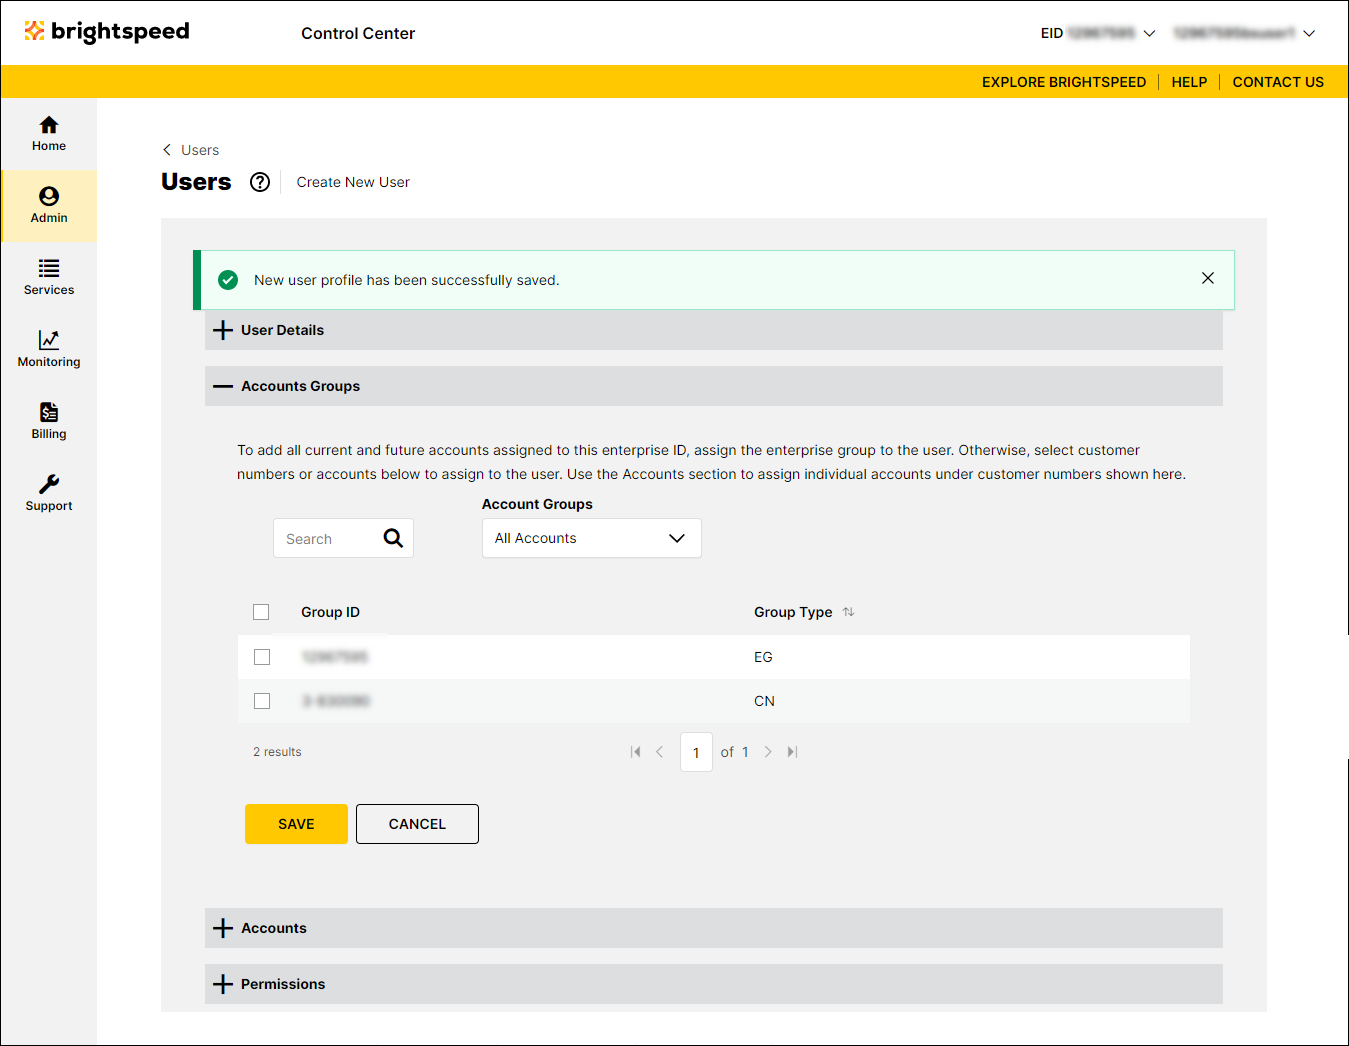
- From the list of account groups, select account groups to assign to the user:
- To assign an account group to the user, click the checkbox on the row for the account group.
- To assign all groups to the user, click the checkbox on the gray bar (above the column of checkboxes).
- To assign an account group to the user, click the checkbox on the row for the account group.
- Click Save.
Control Center opens the Accounts section and lists accounts assigned to the user based on the account groups you assigned in the Assigned Accounts section.
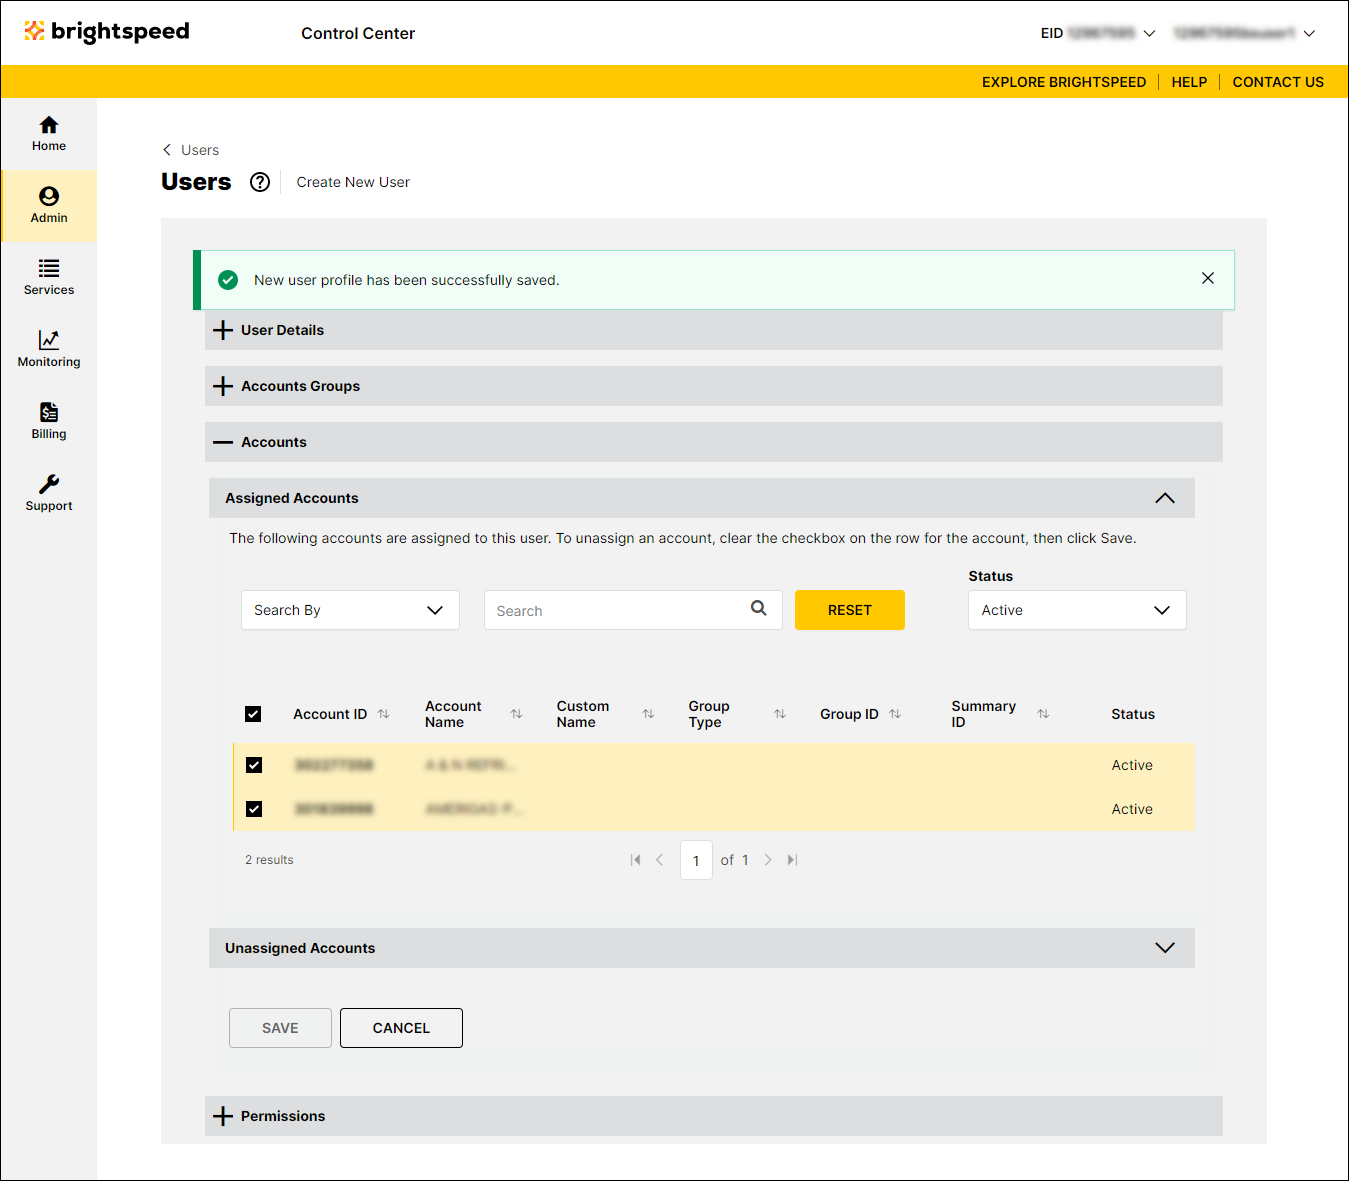
- Click the down arrow on the right end of the Unassigned Accounts section to expand it, then select accounts to assign to the user:
- To assign an account to the user, click the checkbox on the row for the account.
- To assign all groups to the user, click the checkbox on the gray bar (above the column of checkboxes).
- To assign an account to the user, click the checkbox on the row for the account.
- Click Save.
Control Center opens the Permissions section.
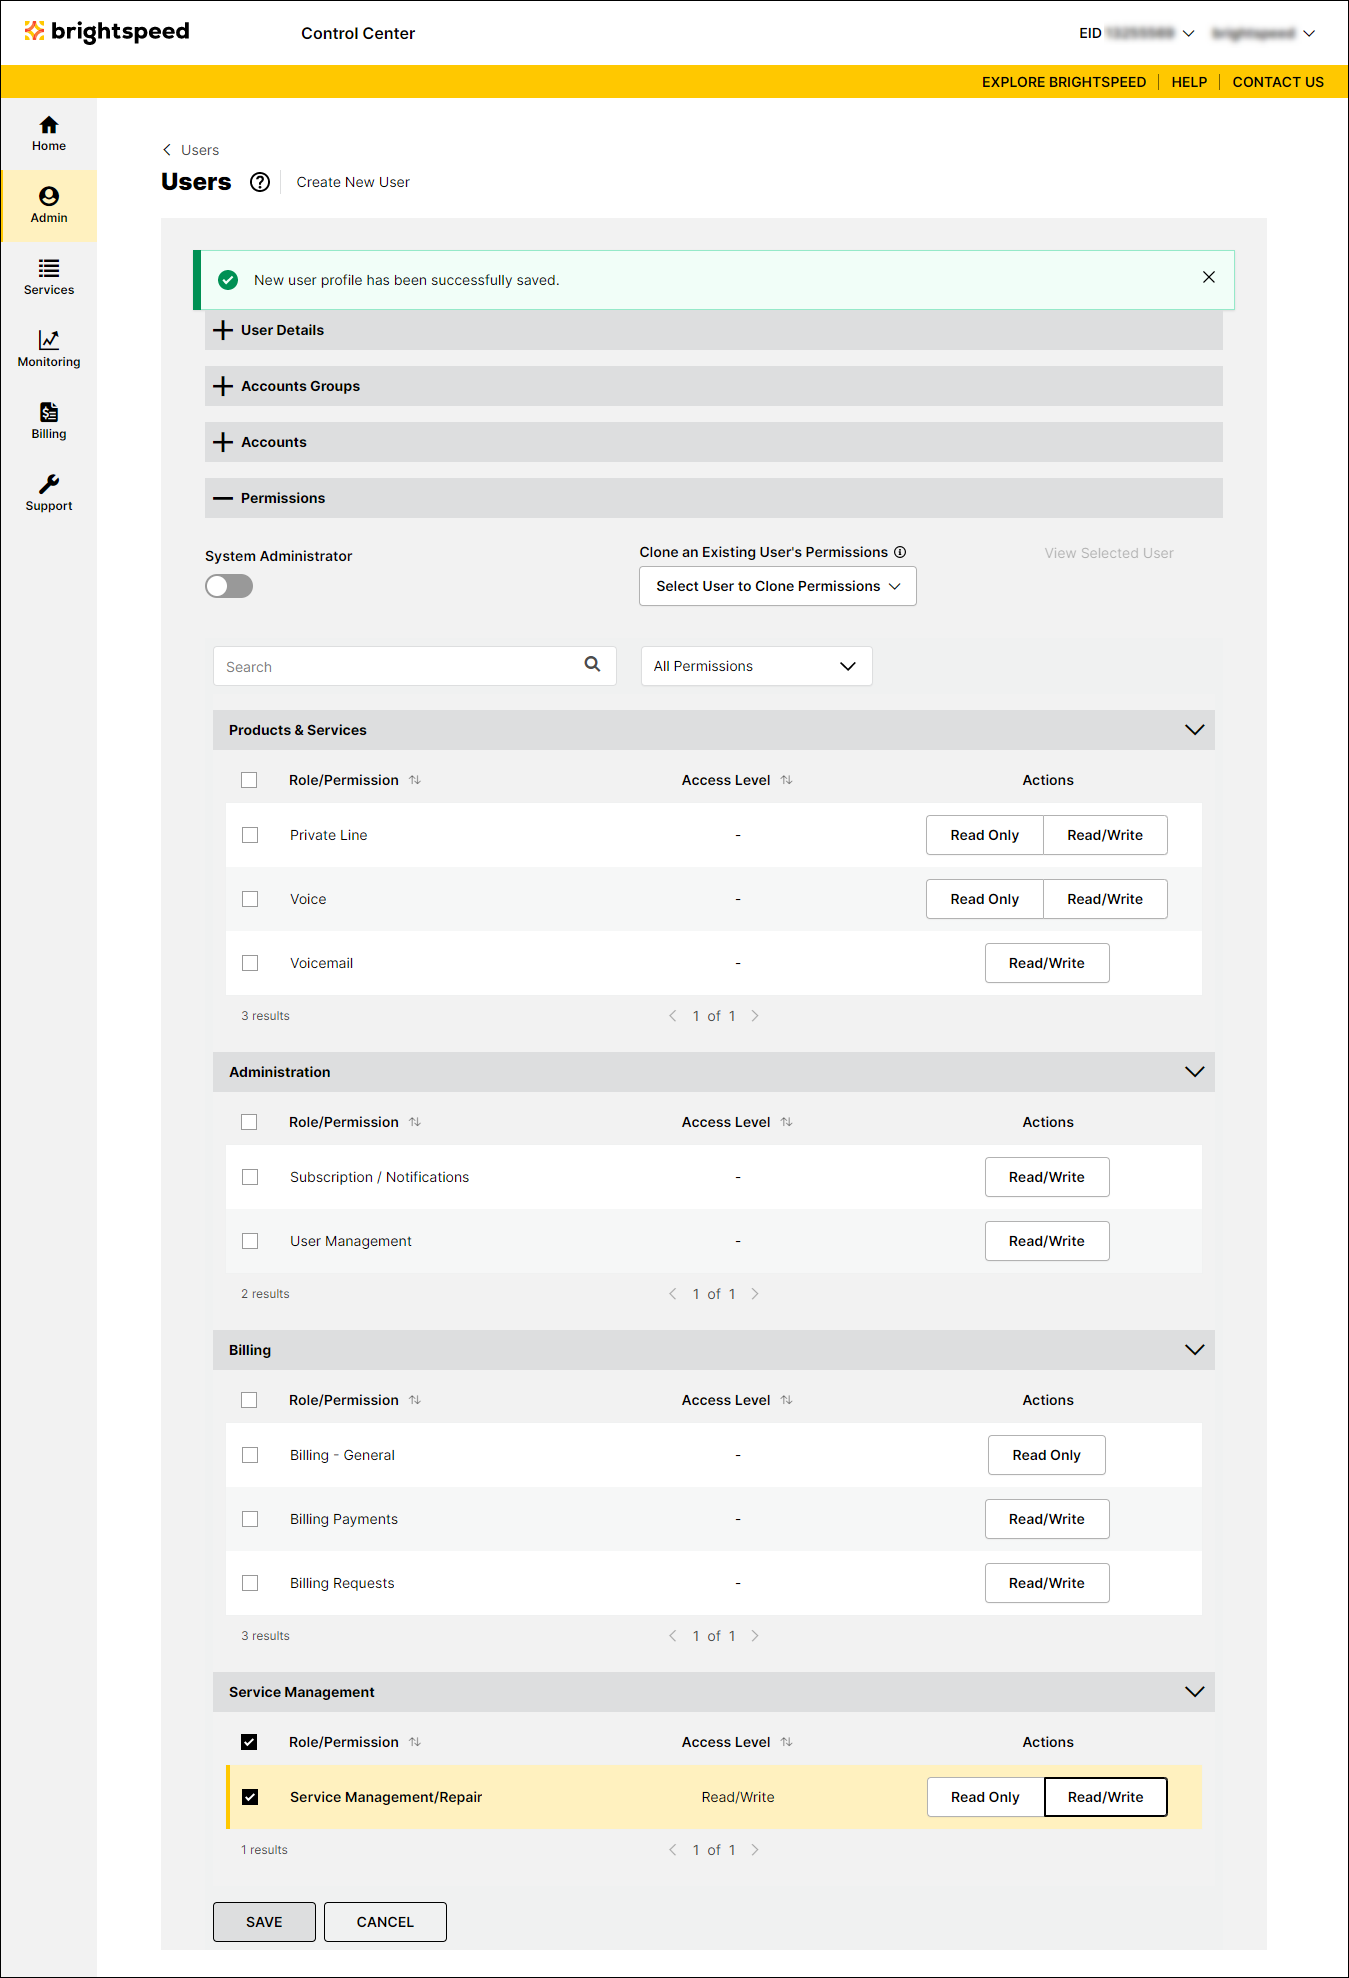
- Select the permissions you want to assign to the user:
- To clone permissions from another user, select a user from the Select User to Clone Permissions list, then click CLONE PERMISSIONS.
- To add individual permissions, click the checkbox on the row for the permission.
- To add permissions for a whole section (e.g., Billing), click the checkbox on the gray bar for the section (above the column of checkboxes).
- To make the user a system administrator, click the System Administrator toggle to turn it on. (System administrators have access to all permissions.)
- When you're done, click Save.
Not quite right?
Try one of these popular searches:
Explore Control Center