Changing the WAN settings on your Brightspeed modem
WAN settings allow you to configure the protocol and addressing type required by Brightspeed for internet access. These settings should not be changed, unless you’re instructed to do so by a Brightspeed technician.
NOTE: Depending on your model, your modem's user interface may appear slightly different from the images below.
Accessing the WAN settings
All configuration types will begin with the same 5 steps below.
1. Connect a device, such as a computer or tablet, to the internet through WiFi or using an Ethernet cable connected to your modem.
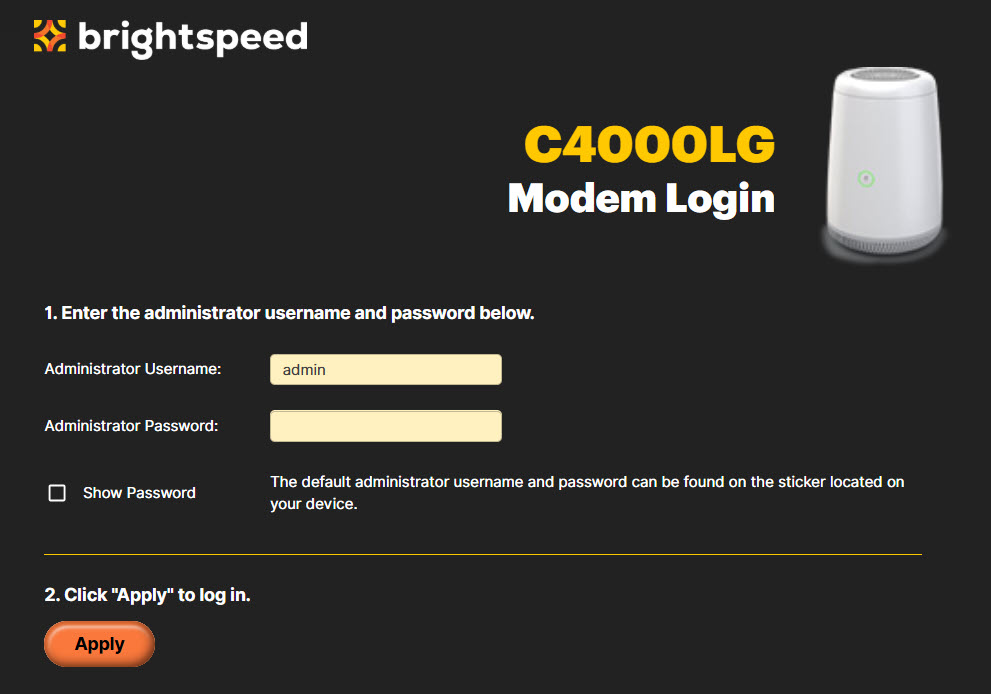
2. Open a web browser and type http://192.168.0.1 into the web address field.

3. Log in to the modem's settings interface (Modem GUI) using your Admin Username and Admin Password. Note that these are different from your wireless network name (SSID) and WiFi password (security key).
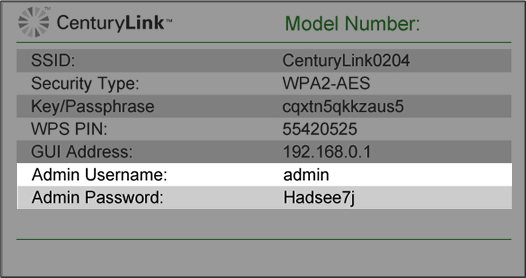
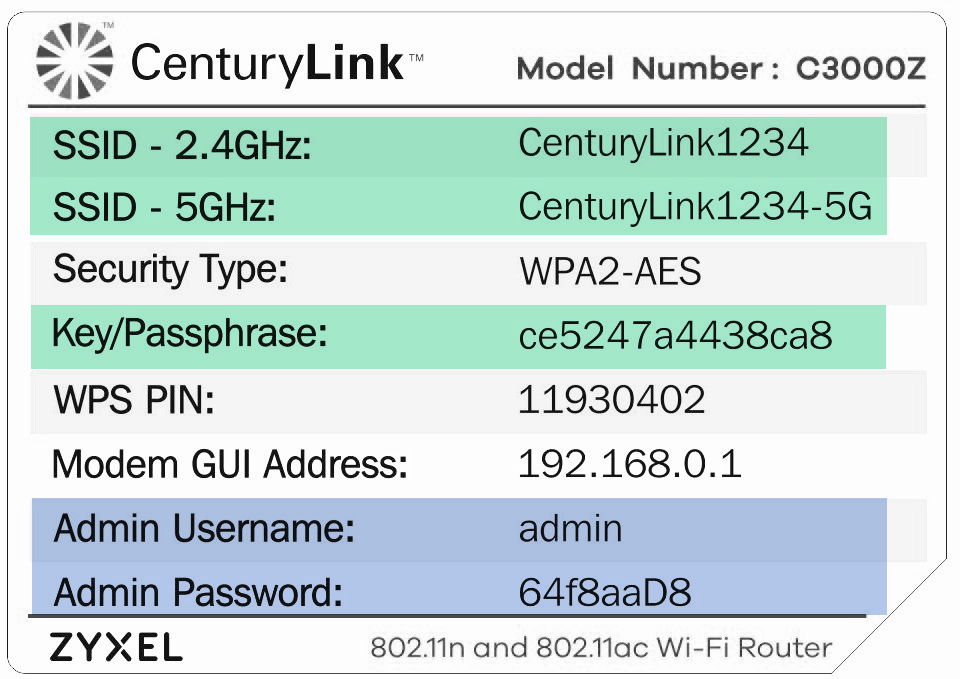
You can find the Admin Username and Password printed on the sticker attached to the side, back or bottom of the modem.
CAUTION! Do not remove or lose your modem sticker, which includes your default admin username and password. These preset credentials cannot be retrieved, and your modem could become unusable without them.
The modem sticker shows you TWO important sets of login credentials. How do you use each one?
SSID and key/wireless password: Used to access and connect to your WiFi network
- SSID is the name that will show up on your devices in the list of wireless networks (may have two for dual-band modem/routers)
- Key/Wireless Password is the password you will enter on your devices to connect securely to your network
- These default settings can also be customized in the modem settings or through the app
Admin username and admin password: Used to log in to your modem settings portal
- Access secure settings such as firmware updates, WiFi security, schedules, and more
- When connected to your home network, go to http://192.168.0.1 to access the portal (also called the GUI)
- These default settings can also be customized in the modem settings
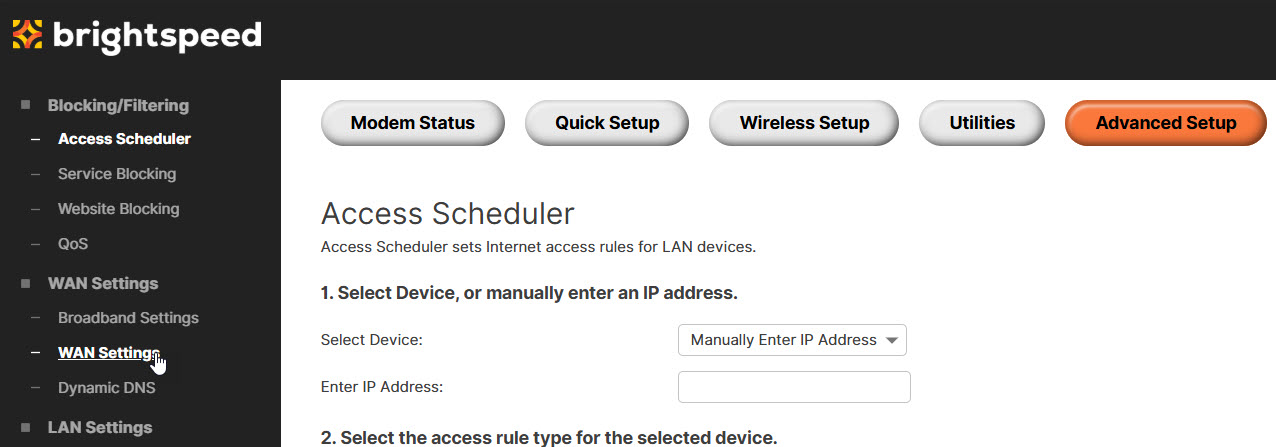
4. Select the Advanced Setup icon in the main menu.
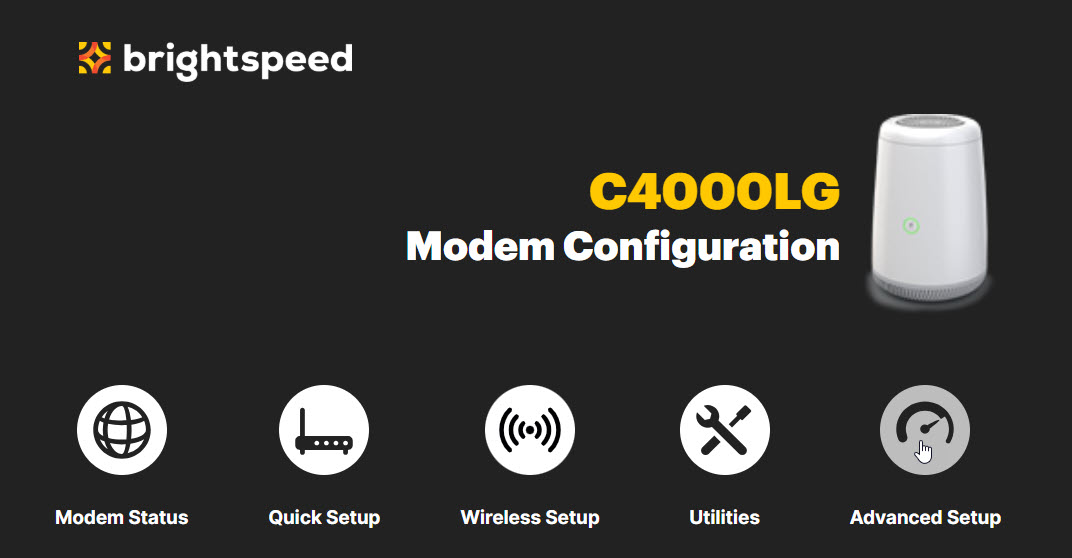
5. Select "WAN Settings" in the left sidebar. This menu option may appear beneath the WAN Settings section, or the IP Addressing section, depending on your modem model.
Next, choose your setup type
A PPP connection is used by some providers to deliver your internet. The DSL light on the modem should be solid green, indicating an active network connection, before configuring this setting.
Start by following steps 1-5 above to access your modem's WAN settings. Then continue with step 6:
6. Select "PPPoE" for the ISP Protocol.
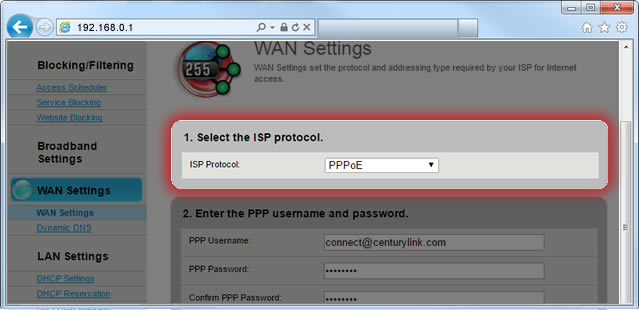
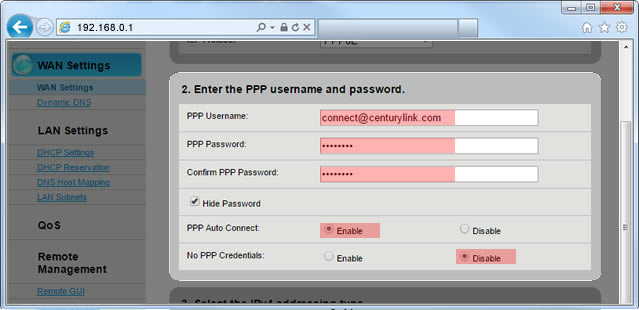
7. Enter the PPP username and password details.
- Enter your PPP username.
- Enter your PPP password.
- Enter the password again to confirm.
- Select "Enable" for "PPP Auto Connect."
- Select "Disable" for "No PPP Credentials."
Note: If you don't know your PPP username or password, chat with tech support.
From here, follow the steps specific to your type of PPPoE setup:
This setup applies to 99% of PPPoE customers.
Make sure you've completed steps 1-7 above, then continue with step 8:
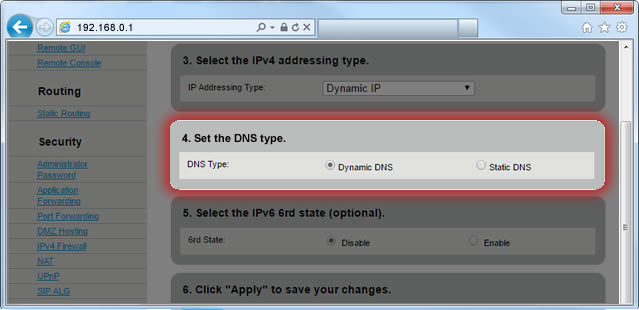
8. Select "Dynamic IP" for the IP Addressing Type.
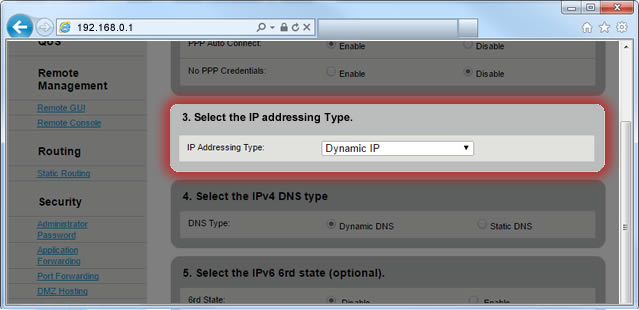
9. Select "Dynamic DNS" for the DNS type.

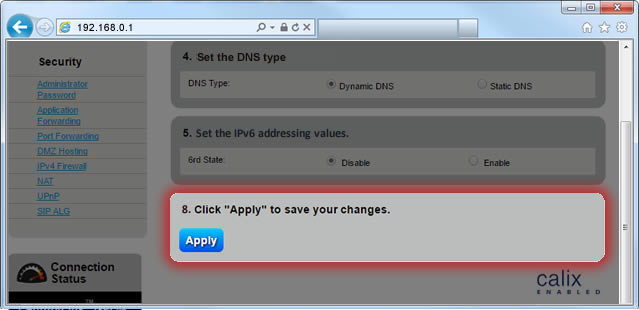
10. Select "Apply" to save your changes.

This applies only if you have leased a single static IP address. Please note that static IPs are not compatible with Prism® TV and are not available in all areas.
Make sure you've completed steps 1-7 above, then continue with step 8:
8. Enter the IP addressing details.
- Select "Single Static IP" for the IP Addressing Type.
- Enter the single static IP address that you leased.
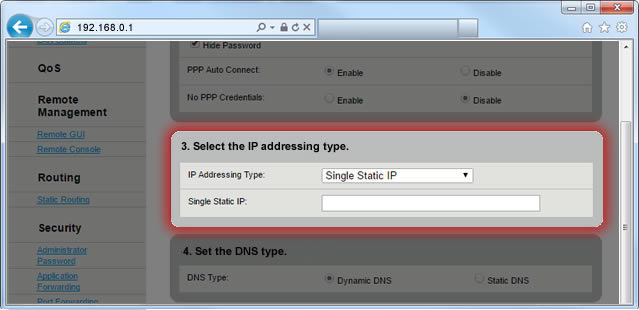
9. Select "Dynamic DNS" for the DNS type.
10. Select "Apply" to save your changes.

This applies only if you have leased a block of IP addresses and want a private or a public LAN (local area network) Subnet. Please note that static IPs are not compatible with Prism® TV and are not available in all areas.
- The Private LAN Subnet tells the modem to assign all devices on the network a private LAN IP address (e.g. 192.168.0.4). The exception is for any device that has the TCP/IP settings manually configured with an "assignable" WAN IP address from your block.
- The Public LAN Subnet option tells the modem to assign all devices on the network an assignable WAN IP address from your block of leased addresses.
Make sure you've completed steps 1-7 above before continuing with step 8:
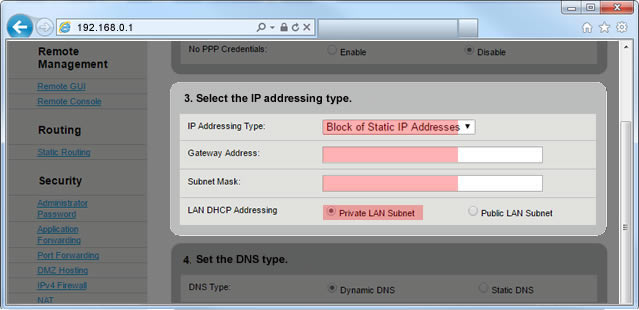
8. Enter the IP addressing details.
- Select "Block of Static IP Addresses" for the IP Addressing Type.
- Enter the "Gateway Address" that was provided to you when you leased your static IP addresses.
- Enter the "Subnet Mask" that was provided to you when you leased your static IP addresses.
- Select either "Private LAN Subnet" or "Public LAN Subnet" for "LAN DHCP Addressing."
9. Enter the DNS details.
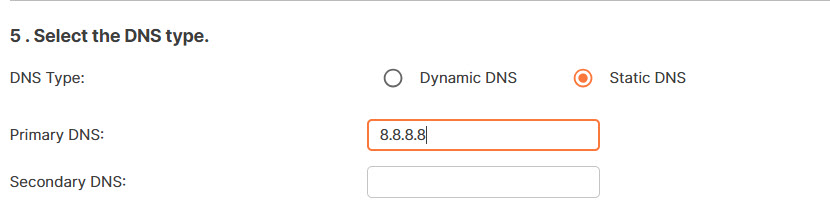
- Select "Static DNS" for the DNS type.
- Enter your Primary and Secondary DNS (DNS lookup).

10. Select "Apply" to save your changes.
The DSL light on the modem should be solid green, indicating an active network connection, before configuring this setting.
Start by following steps 1-5 above to access your modem's WAN settings. Then continue with step 6:
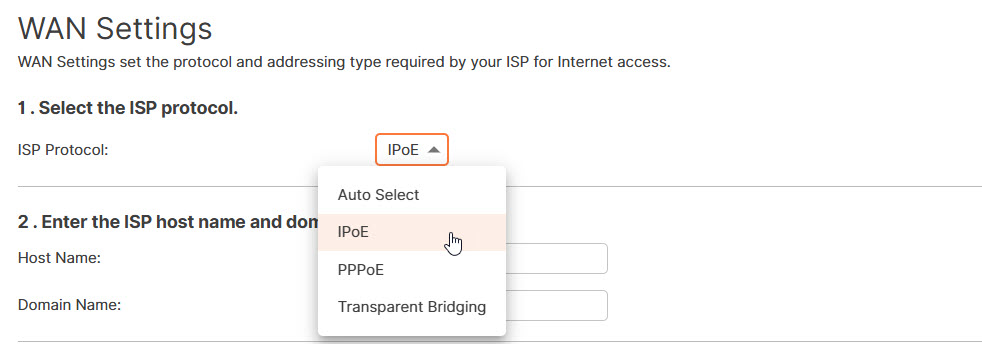
6. Select "IPoE" for the ISP Protocol.
7. Select "Dynamic" or "Static IP" for the IP Addressing type.

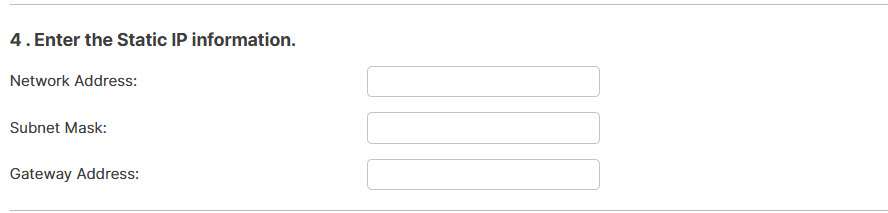
7b. For Static IP only, enter your IP address, subnet mask, and gateway address.
8. For dynamic IP, select "Dynamic DNS." For static IP, select "Static DNS." Enter the primary and secondary DNS for your area.
9. Select "Apply" to save your changes.

The DSL light on the modem should be solid green, indicating an active network connection, before configuring this setting.
Start by following steps 1-5 above to access your modem's WAN settings. Then continue with step 6:
6. Select "Transparent Bridging" for the ISP Protocol.
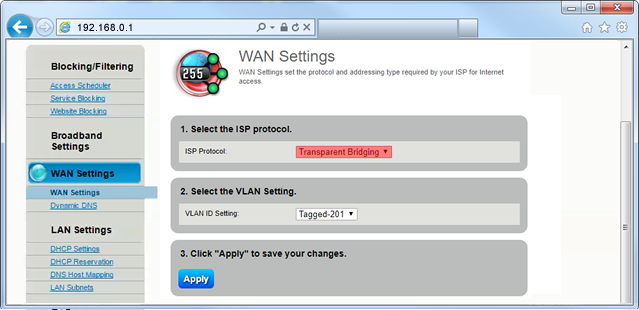
7. Chat with tech support to get the transport mode (VLAN Setting) that works in your area (not available in all areas).
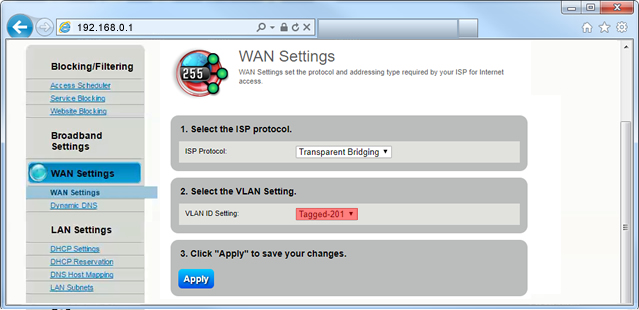
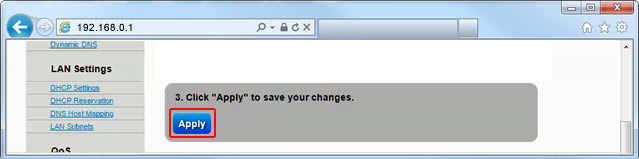
8. Select "Apply" to save your changes.
Top modem/router topics
- Set up your modem and activate internet
- Connect devices to your WiFi network
- Should you use 2.4 or 5 GHz WiFi?
- Brightspeed compatible modems
- How to read your modem lights
- When and how to use modem reset
- How to return a modem
- How to upgrade your modem's firmware
- Modem or router: What's the difference?
View all Modem/Router topics
Top tools
Log in to access our most popular tools.
Brightspeed services support