Basic wireless setup on your modem
Your modem's wireless settings allow you to enable your WiFi and change the network name (SSID). You can also view the current security type, key/passphrase, and WPS PIN for the modem.
NOTE: Depending on your model, your modem's user interface may appear slightly different from the images below.
1. Connect a device, such as a computer or tablet, to the internet through your Brightspeed WiFi or using an Ethernet cable connected to your modem.
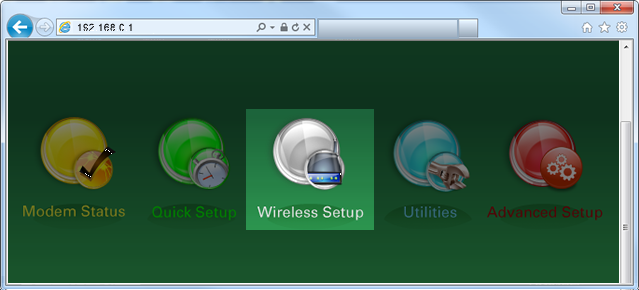
2. Open a web browser and type http://192.168.0.1 into the web address field.

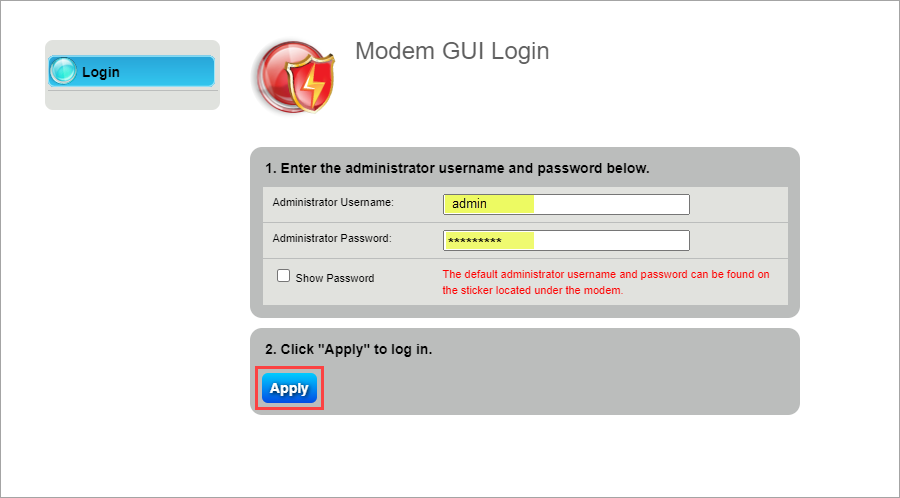
3. Log in to the modem's settings interface (Modem GUI) using your Admin Username and Admin Password. Note that these are different from your wireless network name (SSID) and WiFi password (security key).
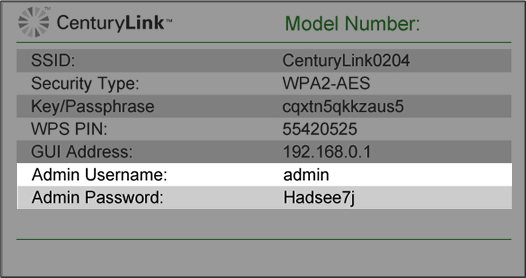
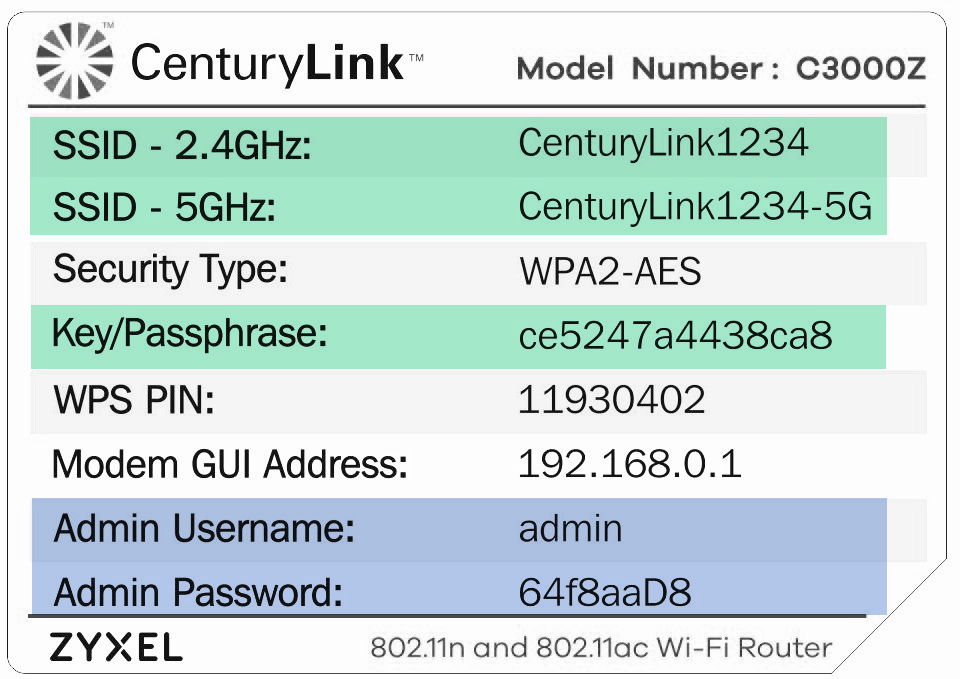
You can find the Admin Username and Password printed on the sticker attached to the side, back or bottom of the modem.
CAUTION! Do not remove or lose your modem sticker, which includes your default admin username and password. These preset credentials cannot be retrieved, and your modem could become unusable without them.
The modem sticker shows you TWO important sets of login credentials. How do you use each one?
SSID and key/wireless password: Used to access and connect to your WiFi network
- SSID is the name that will show up on your devices in the list of wireless networks (may have two for dual-band modem/routers)
- Key/Wireless Password is the password you will enter on your devices to connect securely to your network
- These default settings can also be customized in the modem settings or through the app
Admin username and admin password: Used to log in to your modem settings portal
- Access secure settings such as firmware updates, WiFi security, schedules, and more
- When connected to your home network, go to http://192.168.0.1 to access the portal (also called the GUI)
- These default settings can also be customized in the modem settings
4. Select the Wireless Setup icon in the main menu.
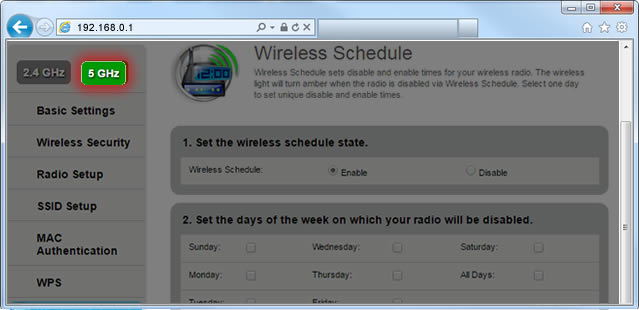
5. If given the choice, select "2.4 GHz" or "5 GHz" in the left sidebar. Not all models offer this feature, so don't worry if you do not see this option.
If you have a dual-band router and want to enable both network frequencies (recommended in most cases), repeat steps 5-11 for each frequency (2.4 GHz and again for 5 GHz). Read more about the how to choose between 2.4 and 5 GHz frequency, and learn which modems have this capability.
6. Select "Enable" for the Wireless Radio. You can also change the network name (SSID) to something more personal and easier to remember here. Finally, you can view more details about your wireless connection, including the security type, key/passphrase, and WPS PIN.
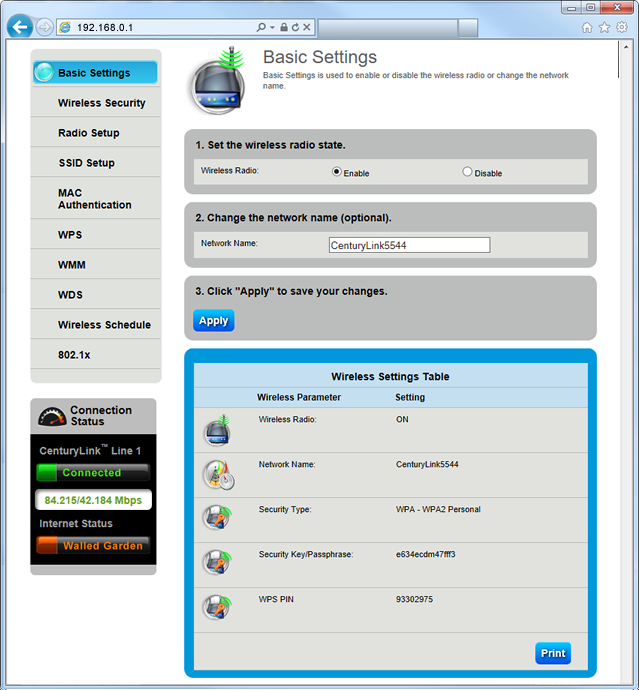
7. Select "Apply" to save changes.

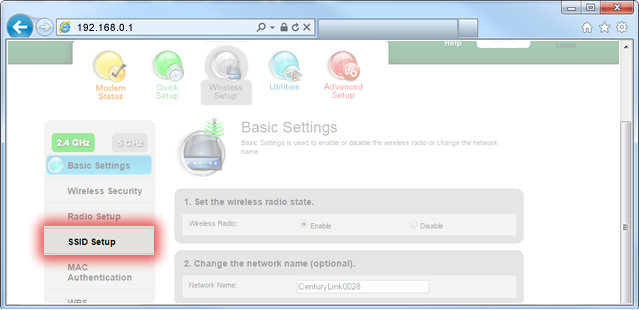
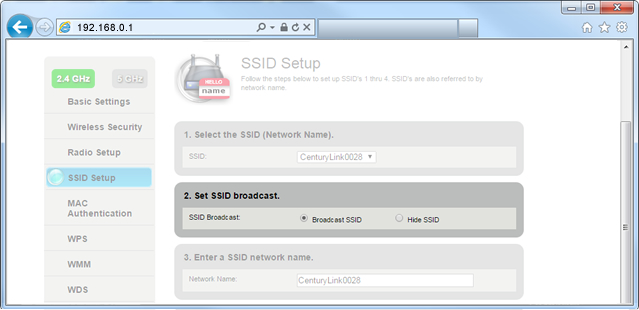
8. Next, make sure the modem is broadcasting the network. To do this, select "SSID Setup."
9. Select the network name (SSID), which you can find printed on the sticker on the bottom of your modem.
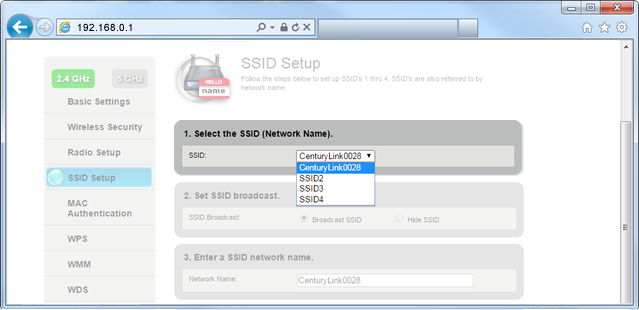
10. Select "Broadcast SSID."
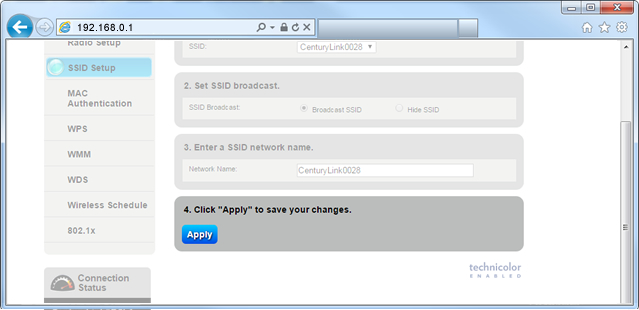
11. Select "Apply" to save your changes.
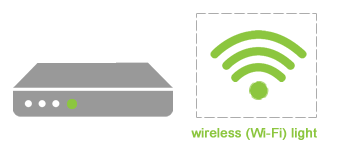
The wireless light on your modem will turn green when the WiFi network is enabled. Once it's on, you can connect devices to your wireless network. Be sure to connect devices using the same frequency you selected on your modem (2.4 GHz or 5 GHz).
Top modem/router topics
- Set up your modem and activate internet
- Connect devices to your WiFi network
- Should you use 2.4 or 5 GHz WiFi?
- Brightspeed compatible modems
- How to read your modem lights
- When and how to use modem reset
- How to return a modem
- How to upgrade your modem's firmware
- Modem or router: What's the difference?
View all Modem/Router topics
Top tools
Log in to access our most popular tools.
Brightspeed services support